
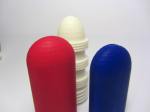
Since a few month, I own an Elegoo Mars Resin printer. It has UV LCD screen for “printing” each layer. In addition, I have an Elegoo Mercury Wash & Cure machine for a few weeks. These machines are incredibly affordable, they work and have a high resolution. The print space is rather small (120 (L) x 68 x 155 (H)…
Tag: encasement
Smooth 3d printed vibrator form for silicone molding
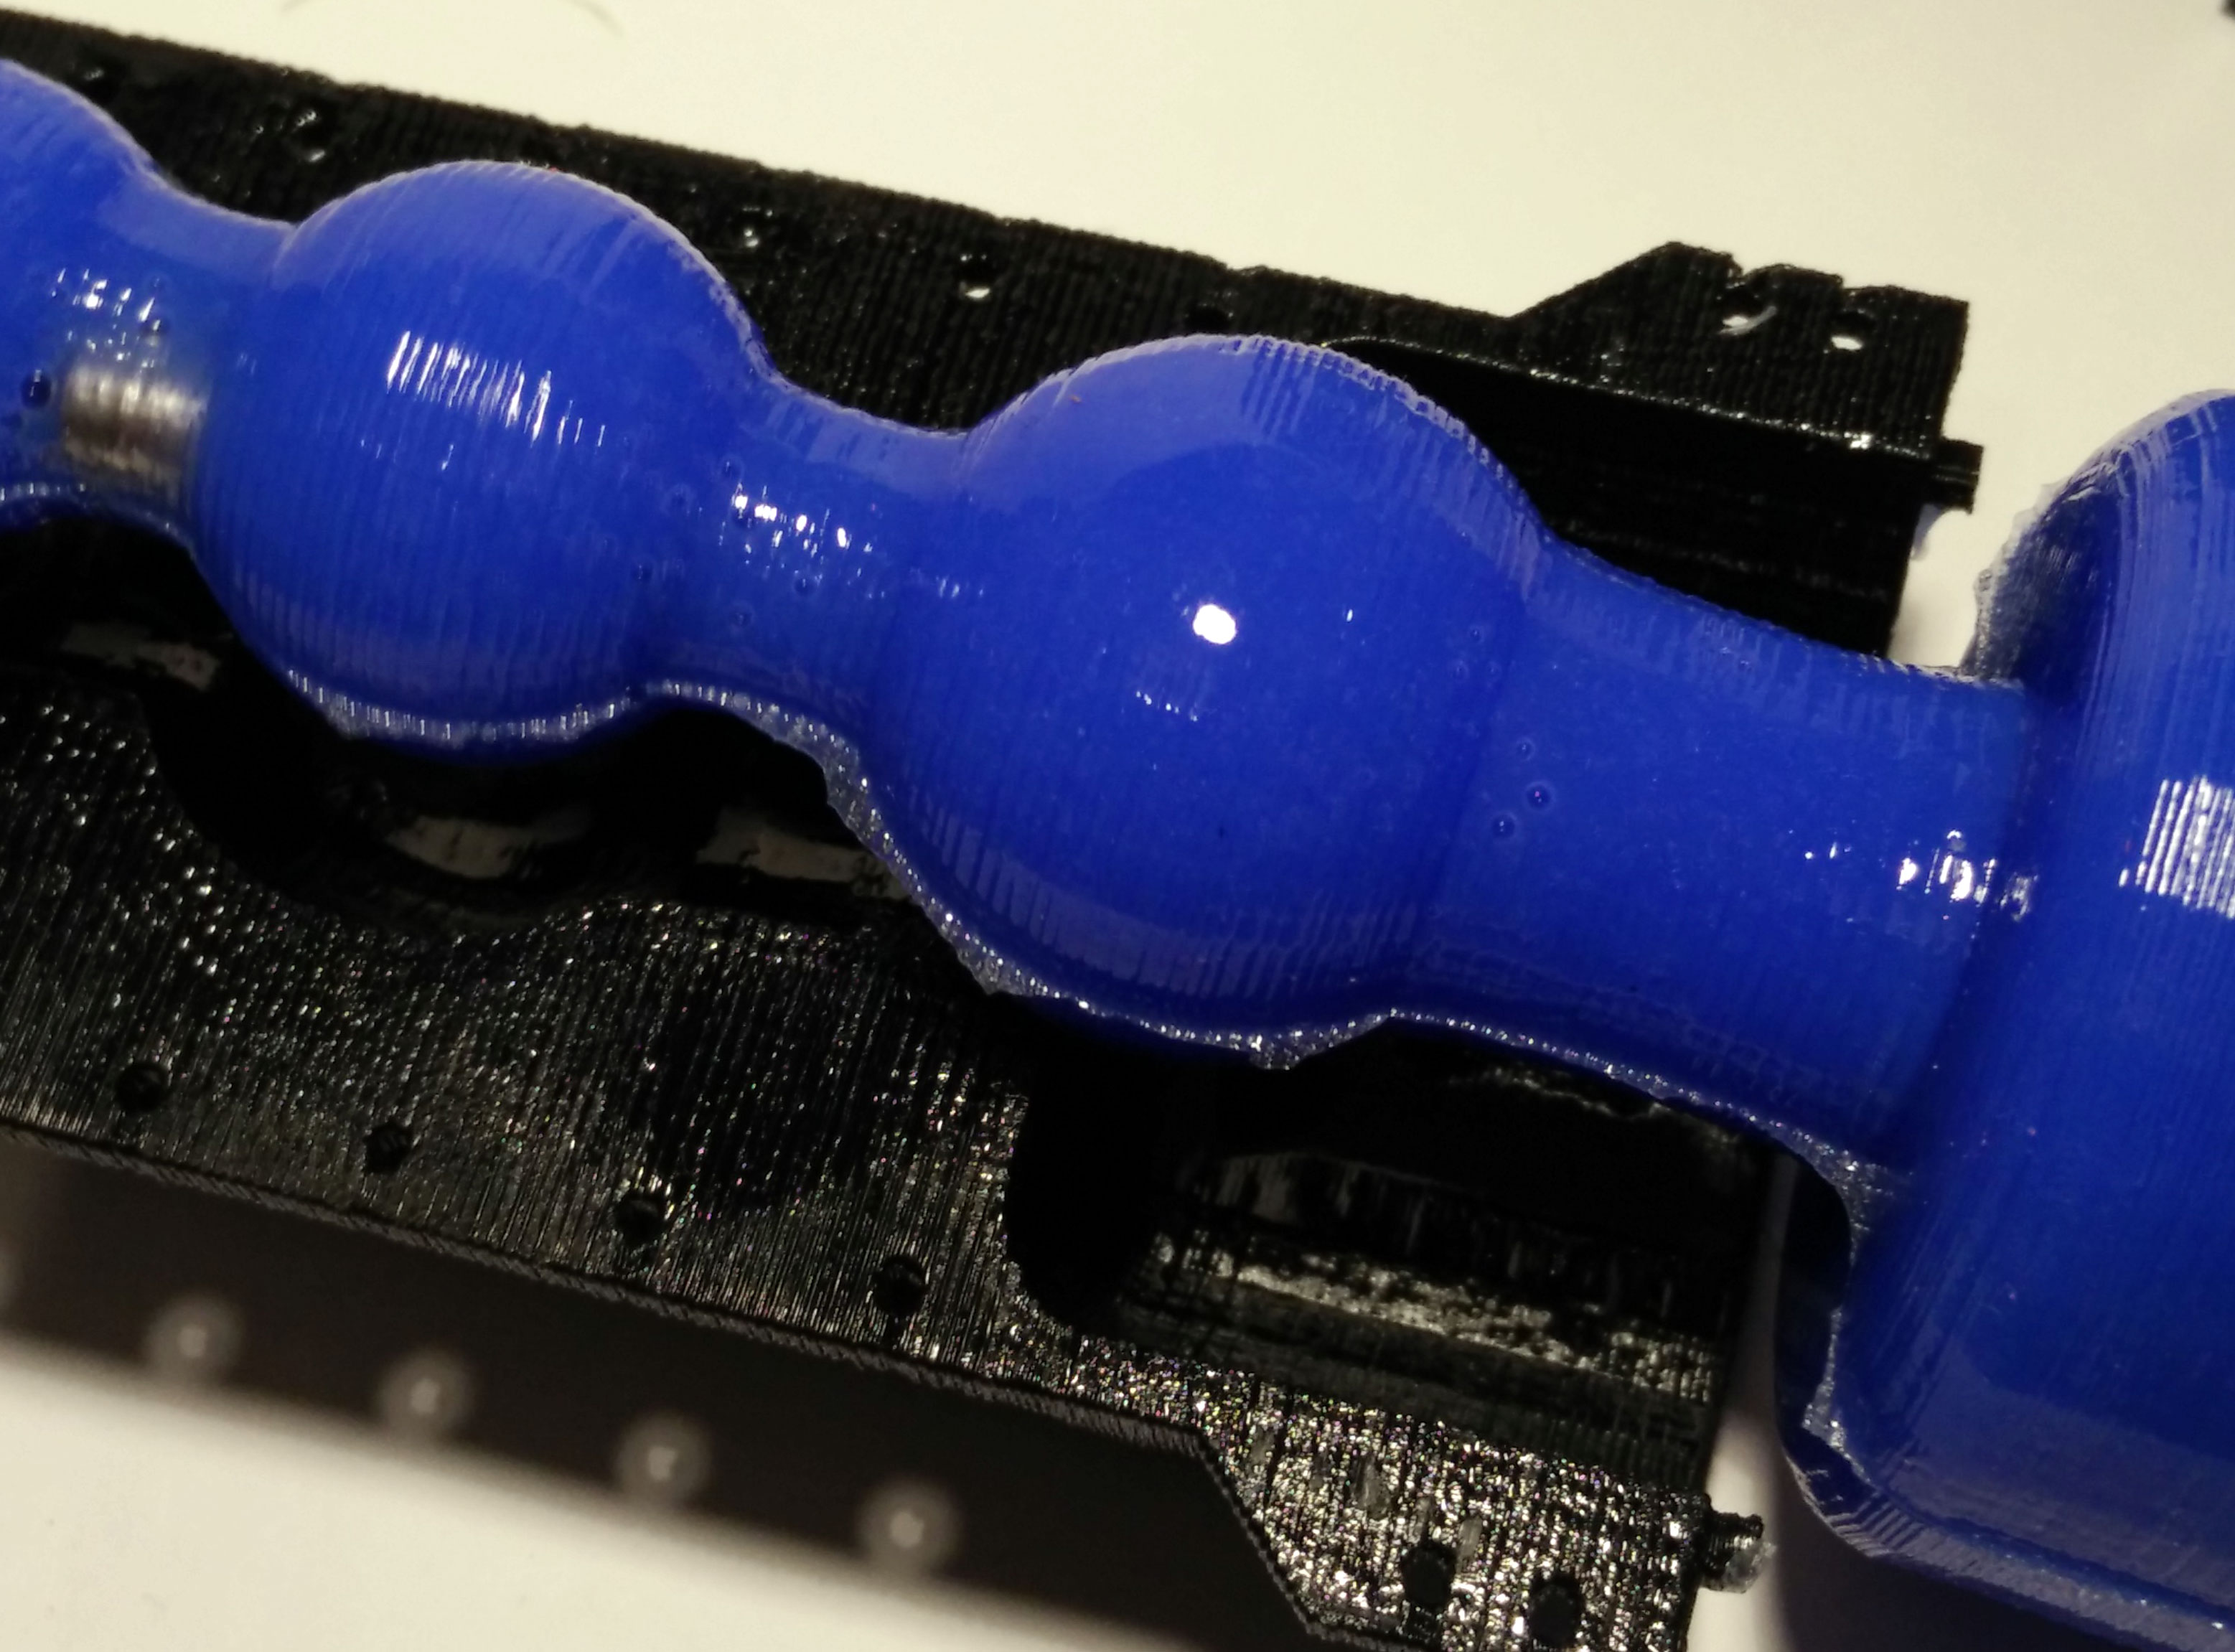 We started with printing sex toys (see here, here and here), then moved to printing mold forms for sex toys and finally we made sex toys which are partially silicone molded and partially printed. The best results were achieved with printing mold forms and fill them with silicone. But even there we have the problem that the surface isn’t really smooth and that it is hard to clean.
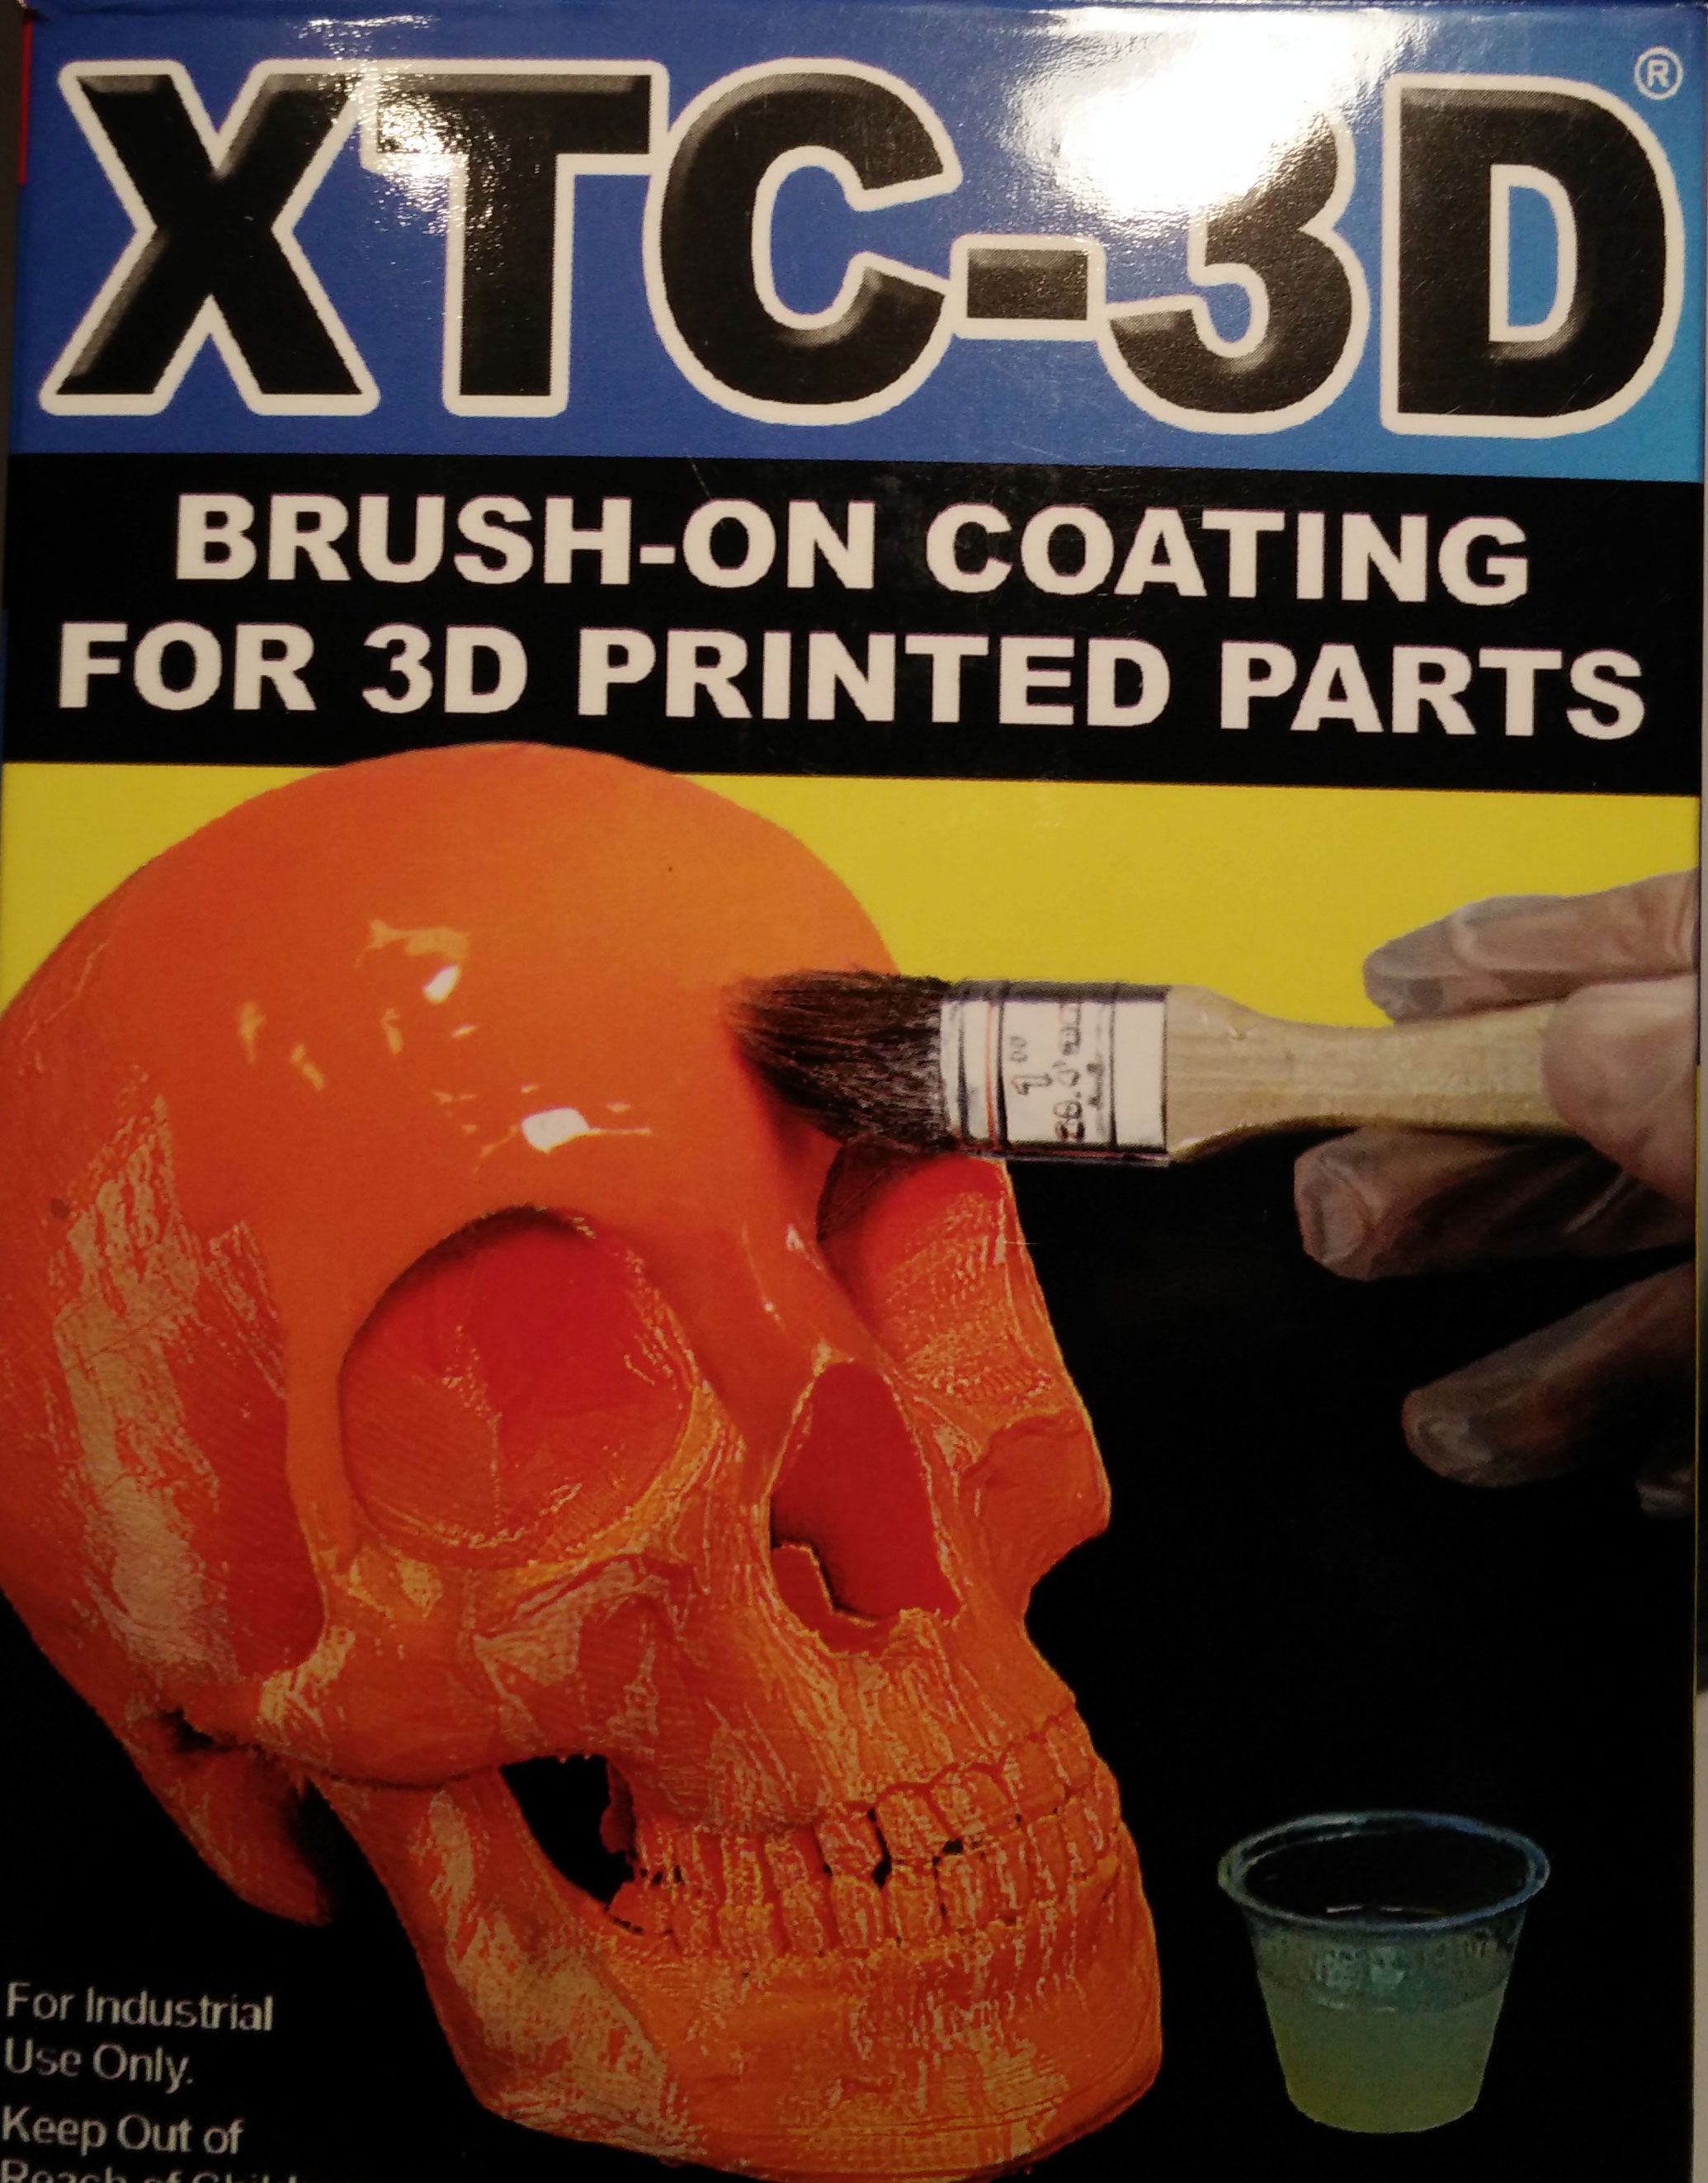 To overcome this problem we use a 3d print smoothing (XTC 3D) to smooth the surface. Application is very easy. It is like applying a transparent varnish. The results are impressive: The silicone gets a smooth shiny surface.
 But you can still see printer artefacts. To overcome this issue you could apply a thicker layer of XTC-3D. If you use a better printer than my daVinci 1.0 the “staircase effect” shouldn’t be a problem at all. Another problem are tiny – sometimes quite large – air bubbles. To remove this air bubbles you need a vacuum chamber. So it is still not perfect, but it works and looks quite good…
Moving dildo with motor driven skeleton
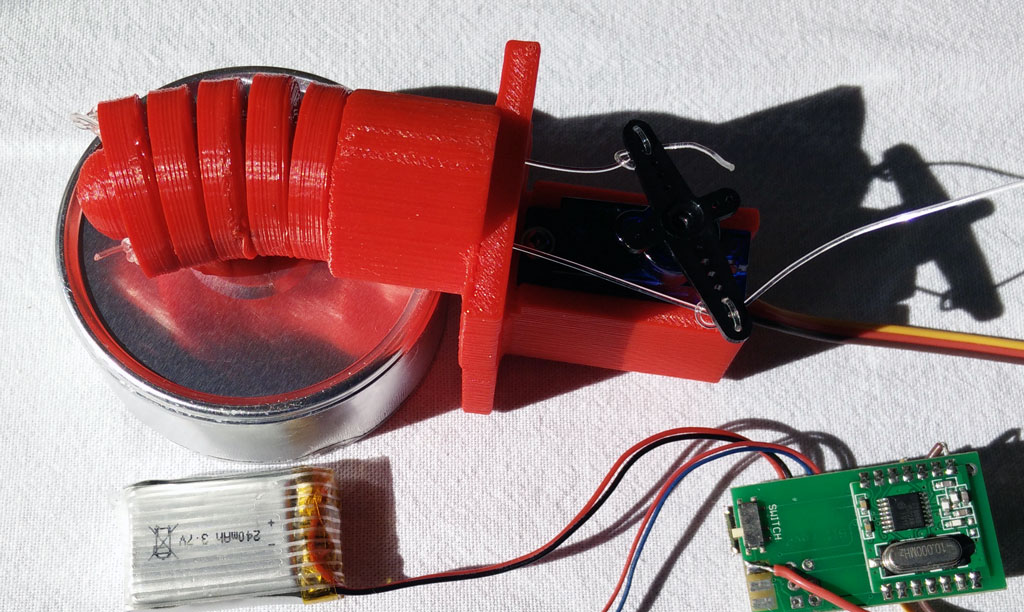 So far we have used vibration motors for our sex toys. Vibration motors are cheap, powerful, easy to control and robust actuators. That’s why they are part of most sex toys. But what about moving or touching objects. Obviously we need some mechanics, maybe joints and gears? Or is there a simple option? A skeleton?
I realized the idea for using some type of skeleton for moving a dildo when I saw the video of a naked Pleo – one of the best artificial life forms ever.

On www.thingiverse.com you will find more inspiration for using a skeleton to move something. The design is very simple.
The skeleton is composed of a number of vortexes. The holes are for connecting all vortexes and a servo with a nylon wire or similar.
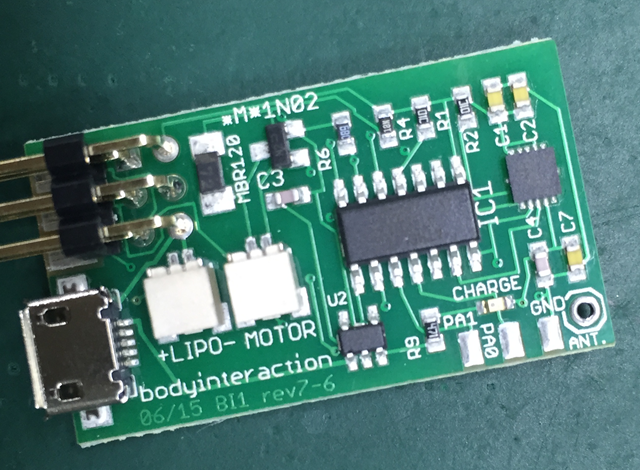
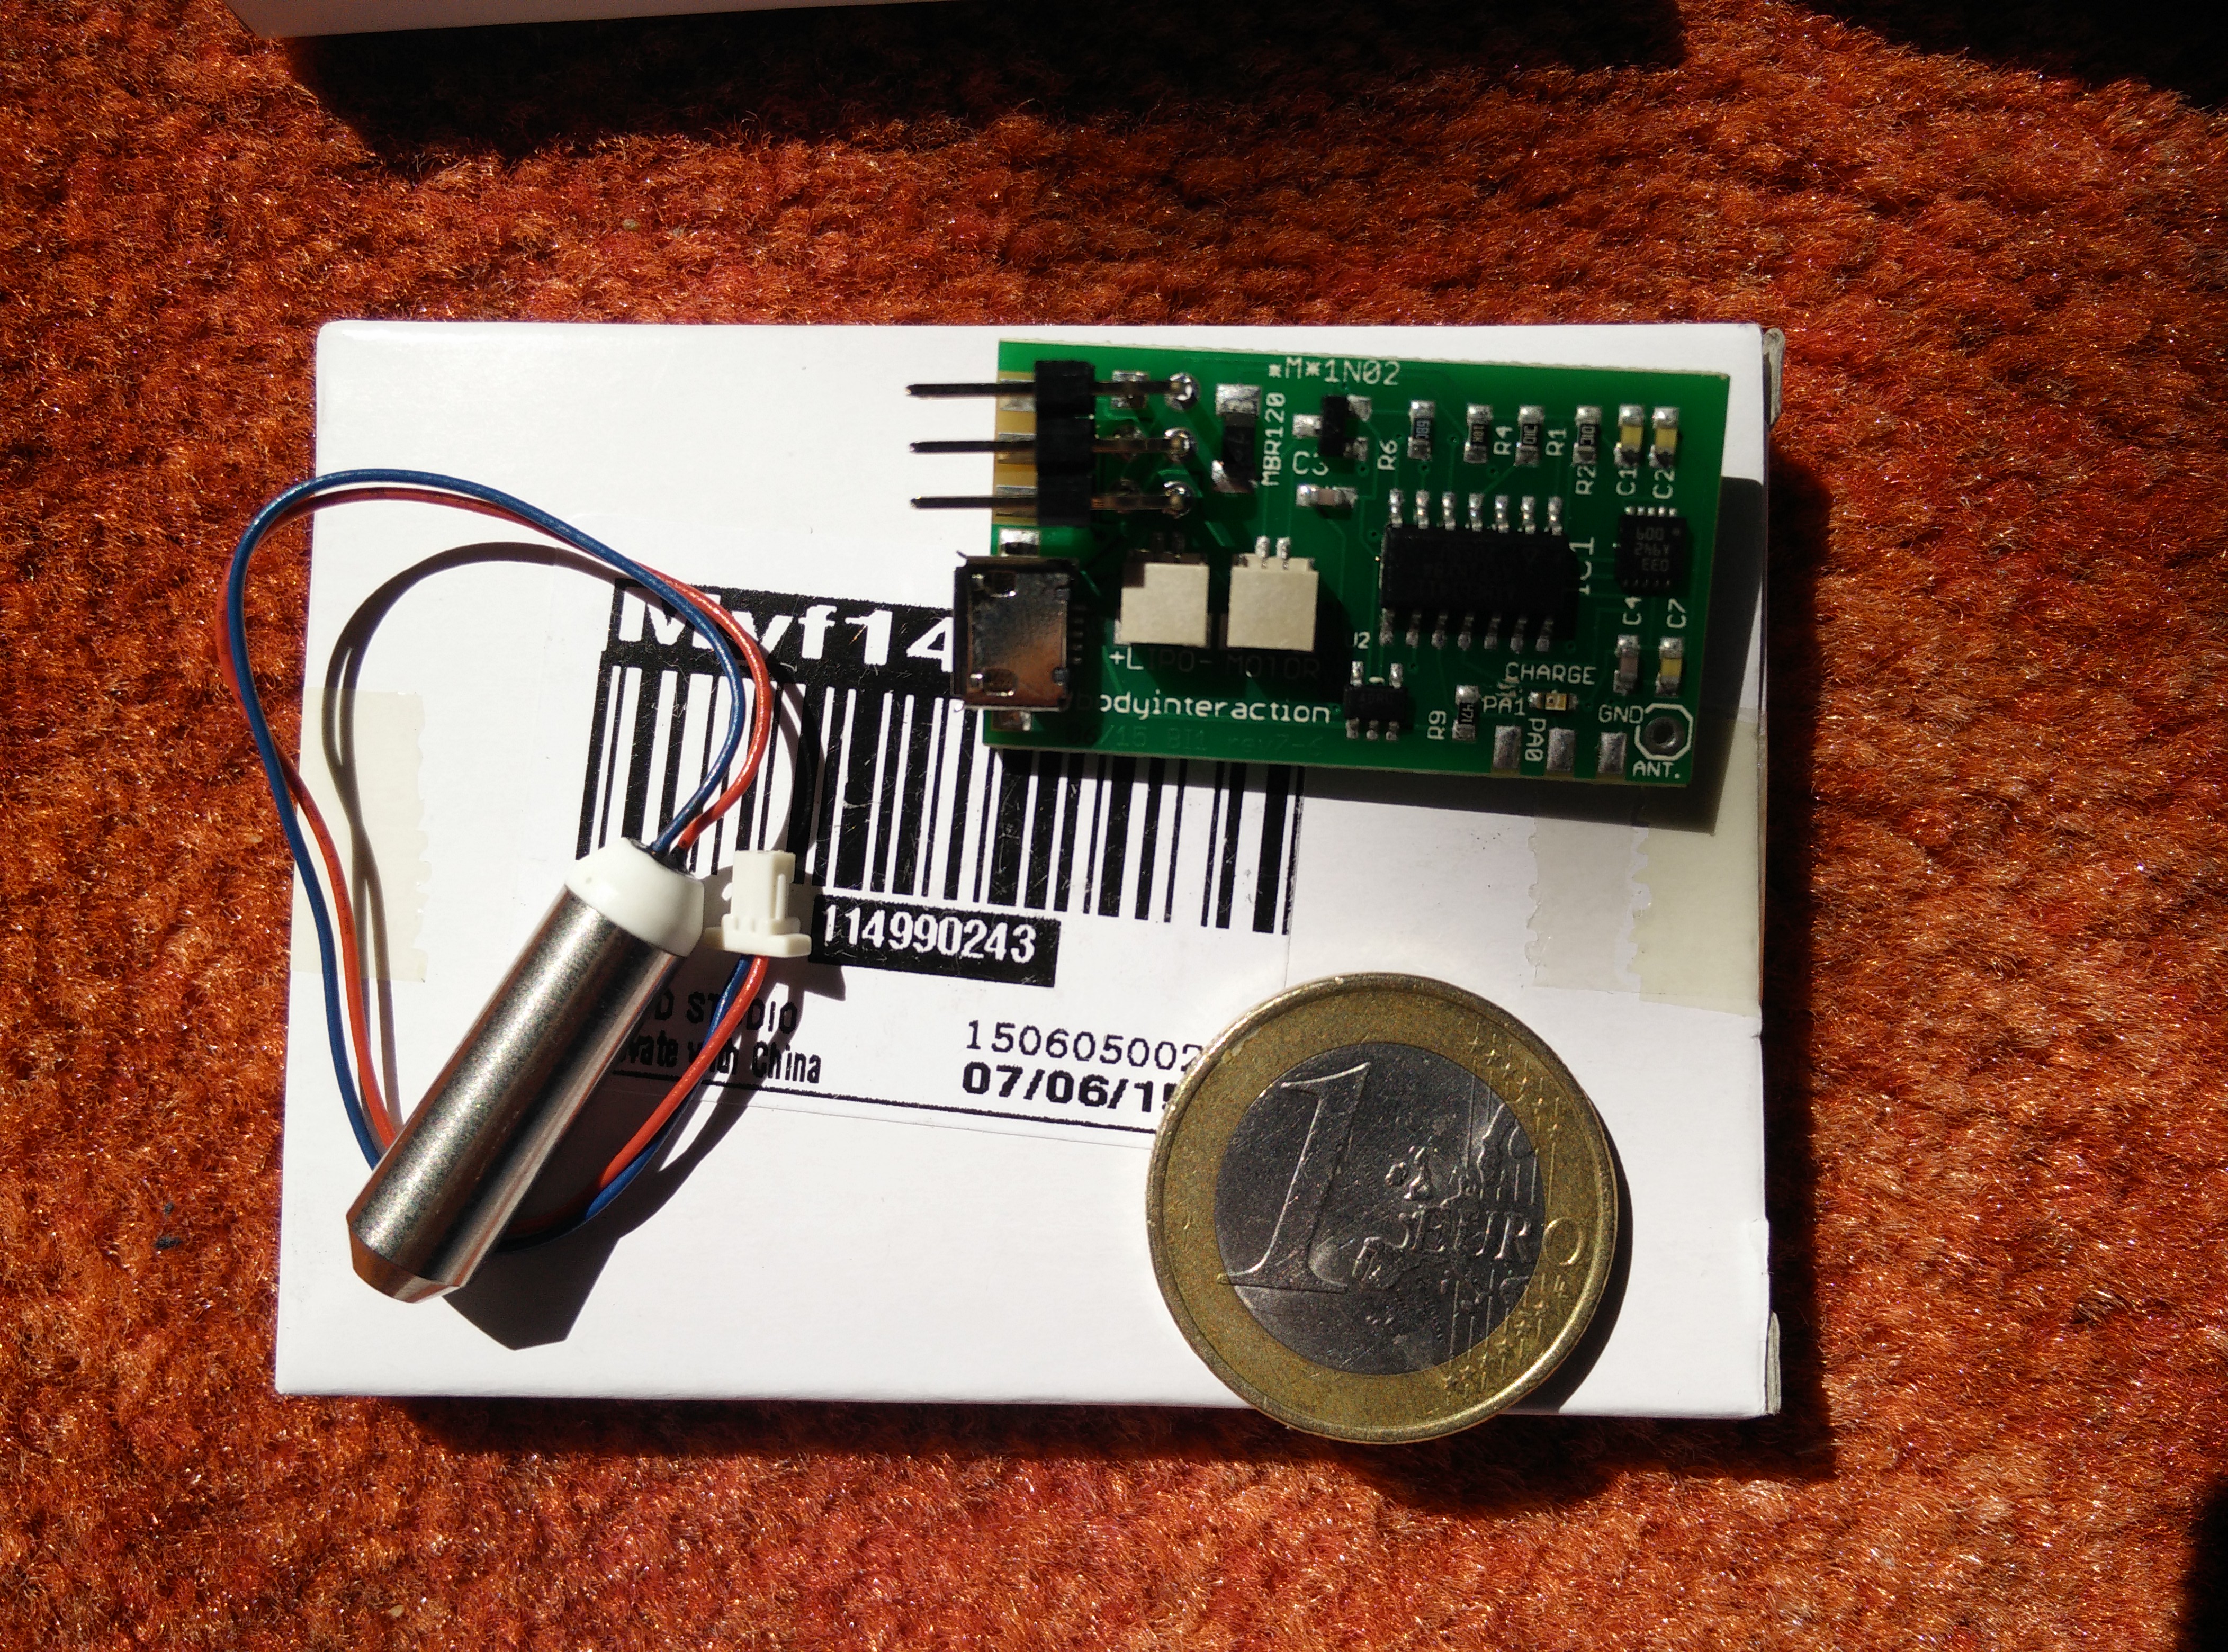
In addition we need a handle where the vortexes are fastened to. There is also space for a servo. Then use a nylon wire to connect the vortexes with the servo. You can drive the servo with a Arduino development board or you use the body interaction development board as described here.

The servo should turn only 15-30 degree or so. If you use the body interaction development board please copy the following code and upload the code to the board.
#include <TinyServo.h>
// servo control with the body interaction development board using the TinyServo library
// -- adaption of the demo script by
// tylernt@gmail.com's ATTiny Hardware Timer Assisted Servo Library v1.0 20-Nov-13
// http://forum.arduino.cc/index.php?action=dlattach;topic=198337.0;attach=71790
const byte SERVOS = 1; // number of servos is 1
const byte servoPin[SERVOS] = { 7 }; // servo is connected to PA1 which is pin 7
#define SERVO 0 // our servo is given the name &quot;SERVO&quot;
void setup() {
setupServos();
}
void loop() {
moveServo(SERVO, 0); // move servo to 0°
delay(1000);
moveServo(SERVO, 30); // move servo to 30°
delay(2000);
}
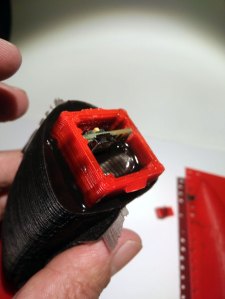
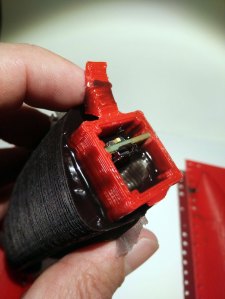
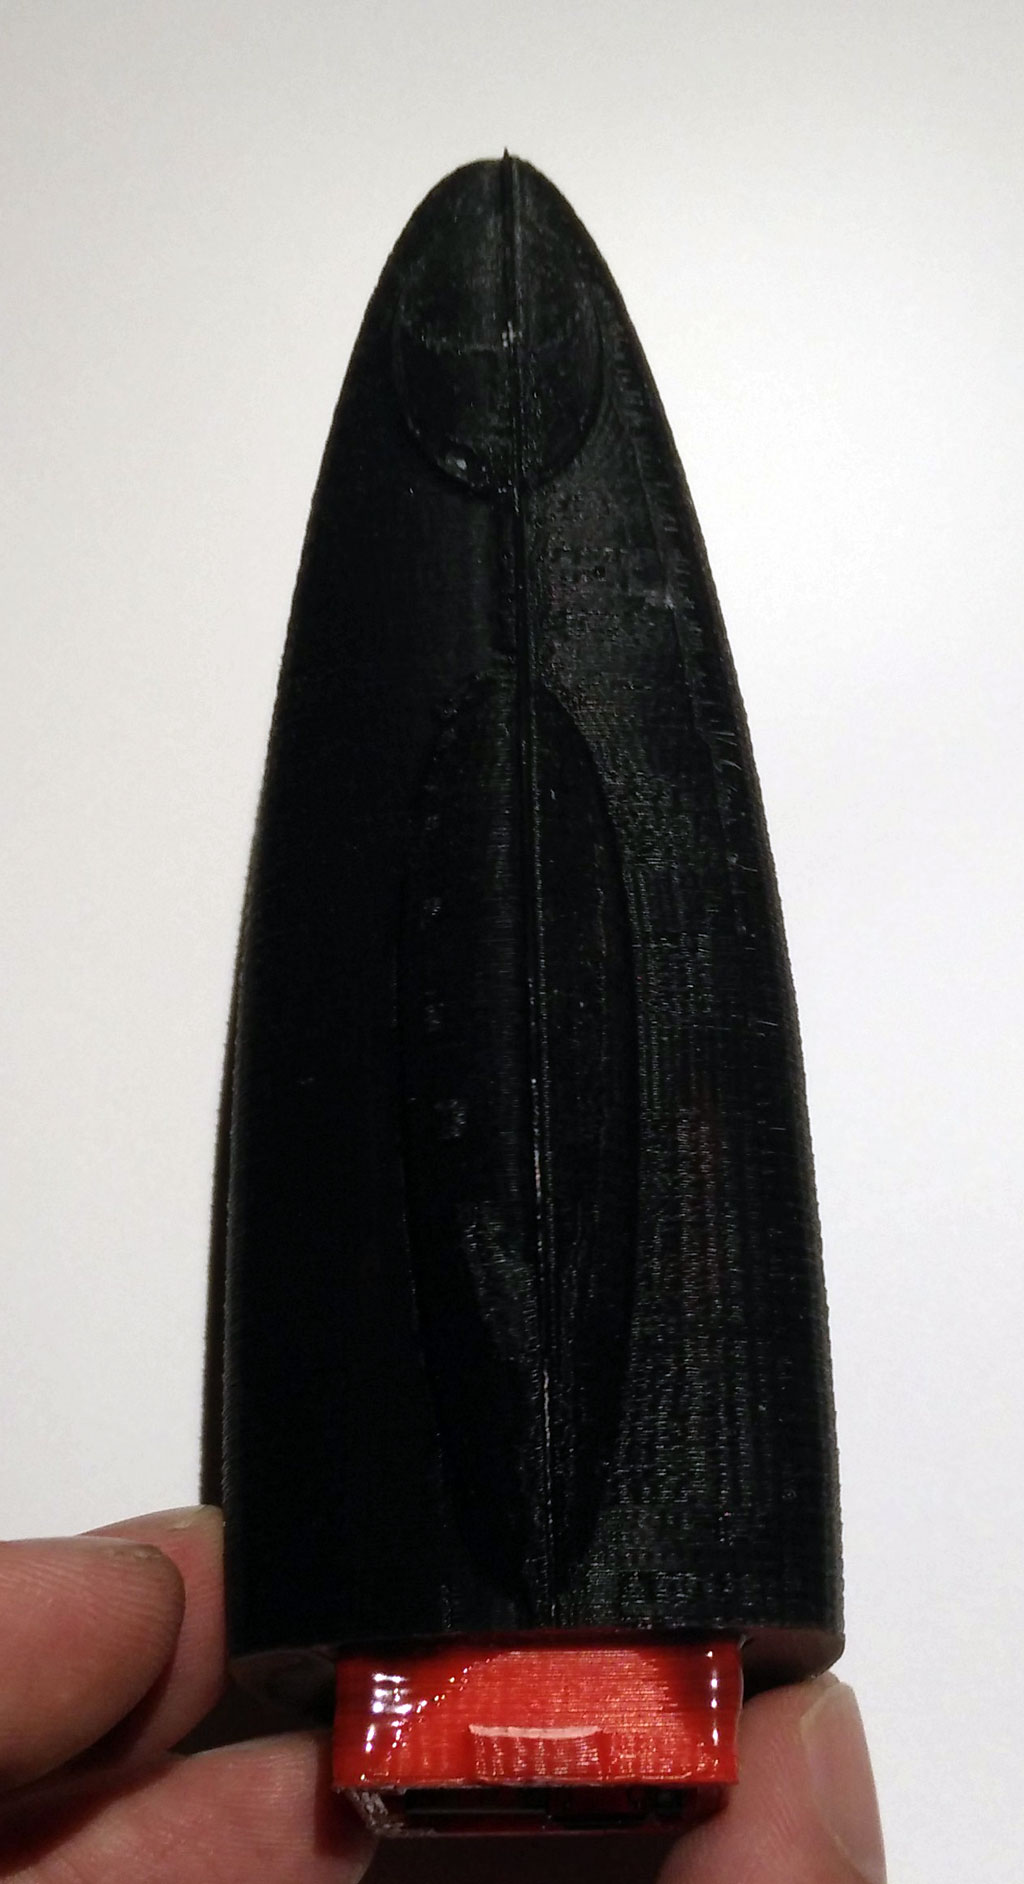
In addition we need a wrapping for the skeleton. This can be made using these two forms (download STL files).
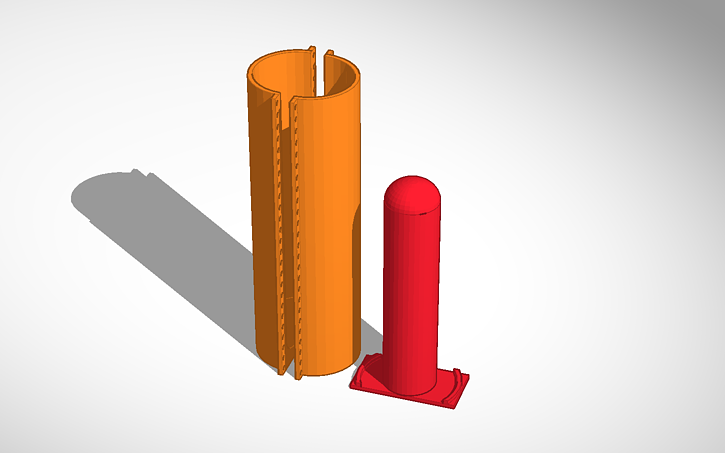
Use flexible silicone and poor it in the form. The thickness of the wrapping is a bit too large – it rather hinders the skeleton in its movements. But it works!

Now we can put everything together.
Download on Thingiverse: http://www.thingiverse.com/thing:1736282
Tinker with Tinkercad!
Form: https://tinkercad.com/things/e8yscABu9Al
Skeleton: https://tinkercad.com/things/dfbMQsE4Mtl
Servo handle: https://tinkercad.com/things/5EHHrqM5sqC
YouTube: https://youtu.be/F1b8bGbuSHw
New small fusion vibrator
 This is a small version of the fusion vibrator. The small fusion form for molding can be made with 3d printers with smaller volume. In addition the inlay for the body interaction development board is reduced in size, but there is still enough place for board and battery. Only about 120ml silicone are needed. The form was constructed in Tinkercad.
Modify the form in Tinkercad: all forms, inlay only, form only
Download the STL files for printing: round_something_06_final_inlay_improved. There are some artifacts but printing is fine on the daVinci 1.0.
Download and discuss in Thingiverse: http://www.thingiverse.com/thing:1589075

Please follow the instruction from the large fusion vibrator. When you poor the silicone into the form it is very important to keep the USB connector free from silicone. Even very small amounts can cause the USB connector to break apart from the board. When the USB connector is broken then you cannot recharge the vibrator. Also be always very cautious when you plug-in or plug-out the USB connector.


Finally you can remove the overhanging parts from the inlay.


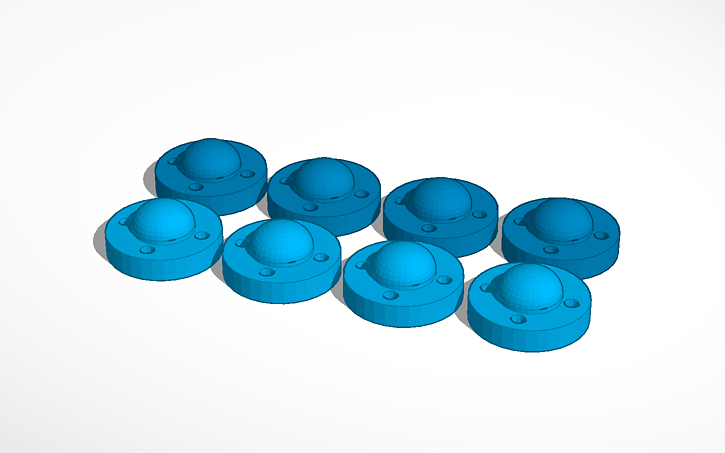
Update for “balls revisted” – silicone molded vibrator
 The “ball revisited” silicone molded vibrator uses a wireless charging module. Unfortunately there are different version available. The version with some textile like cable jackets have a different inner radius of the receiver coil.
 We have changed the mounting on top of the picture as this type of the receiver coil needs a little more space. In addition the encasement is a bit larger.
  There is enough space for the body intercation board (top), wireless charging board (right) and the LiPo battery (below).
 Finally the wire of the vibration motor is glued in the middle of the encasement.
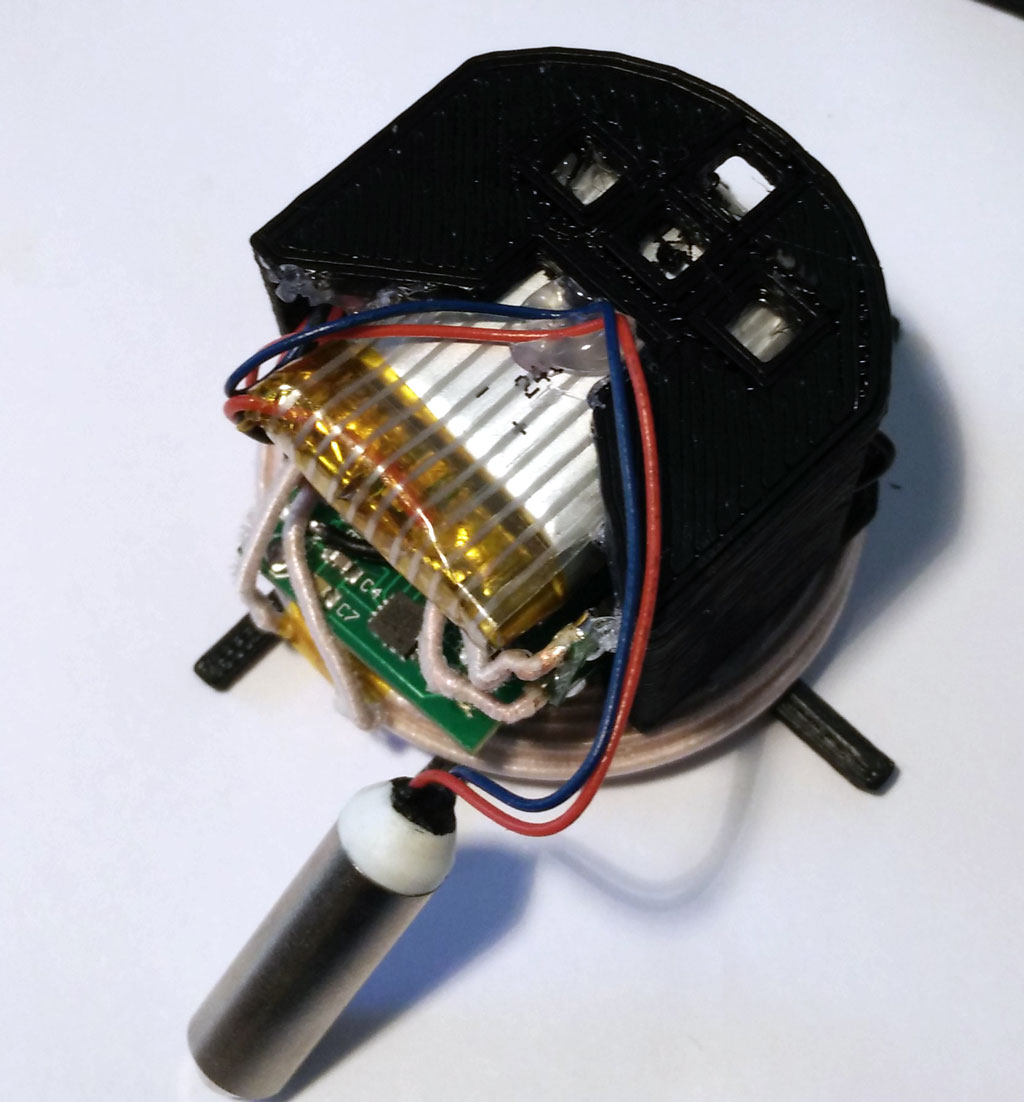 Please follow the “old” instruction – nothing has changed. When printing out the 3d parts use the new version 4 of the inlay. All 3d printing STL files at Thingiverse
How-to assemble the vibrator ring case

We have ordered a food safe version of the vibrator ring case from a 3d printing service provider. The case consist of the main body and a kind of cap to close the case.
The design could be improved to have more space for the battery and a more stable cap. The ring diameter is too small for most males, but you can combine the vibrator ring and the “organic” vibrator for her. The combination of these two vibrators gives you a vibration in two dimensions. (The vibration of a vibration motor is only strong in one direction – you can think of either the x-, y- or z-axis of a coordination system. If you combine two motors you have vibration along two axes of the coordination system, take three you have vibration along all axes).
The video shows how-to assemble your own vibrator ring.
Improved version! Open with Tinkercad. Download from Thingiverse.
Assembling the new violet vibrator form
![IMG_20150901_211915[2]](https://bodyinteraction.com/wp-content/uploads/2015/09/img_20150901_2120102.jpg)
We ordered the organic vibrator form from Sculpteo. They offer material which can be used for food – so it’s very safe.
![IMG_20150901_212010[2]](https://bodyinteraction.com/wp-content/uploads/2015/09/img_20150901_2120102.jpg?w=169&h=300) All you need for assembly is the body interaction motion controlled vibrator development board and two M3 screws (about 6mm long).
All you need for assembly is the body interaction motion controlled vibrator development board and two M3 screws (about 6mm long).
The video explains how-to assemble the Arduino compatible body interaction vibrator board and the form.
Improved vibrator ring
 There is new version of the vibrator ring. The height is smaller than in the original version. As there must be enough space for the vibrator development board, the LiPo battery and the vibration motor the case is larger in height. Board and LiPo are now beside one another. The new case is printed with the daVinci 1.0 3d printer with yellow ABS.
 Modify and create your own with Tinkercad. Or download from Thingiverse.
Dimensions: 78x48x10mm
Improved version! Open with Tinkercad. Download from Thingiverse.
Video about BI1 encasements and applications
Here is a Video showing different BI1 cases and applications.
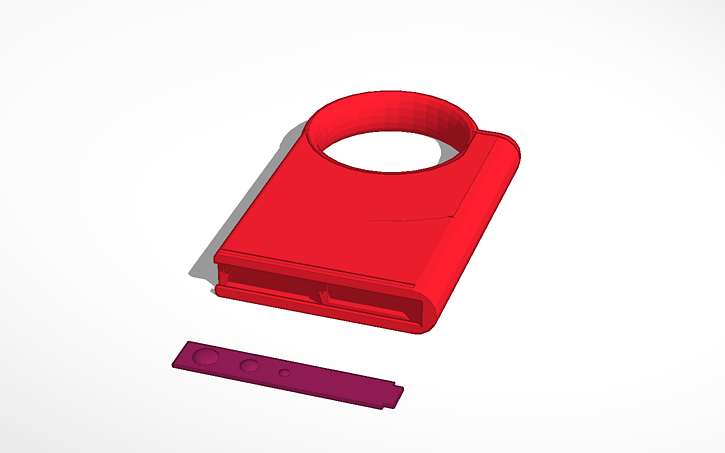
Encasement printed with da Vinci 1.0 printer
The development of the encasement for the body interaction takes a lot of time although we use 3d print services. The 3d print services need one to four weeks until delivery. The quality of the cases are good, but if you wait so long for the next iteration of the design, it can’t be called rapid prototyping. Now we bought…
