
Install Arduino 1.6.7
Download the Arduino software and install it: https://www.arduino.cc/en/Main/Software
Now click Edit on the menu and then select Preferences.
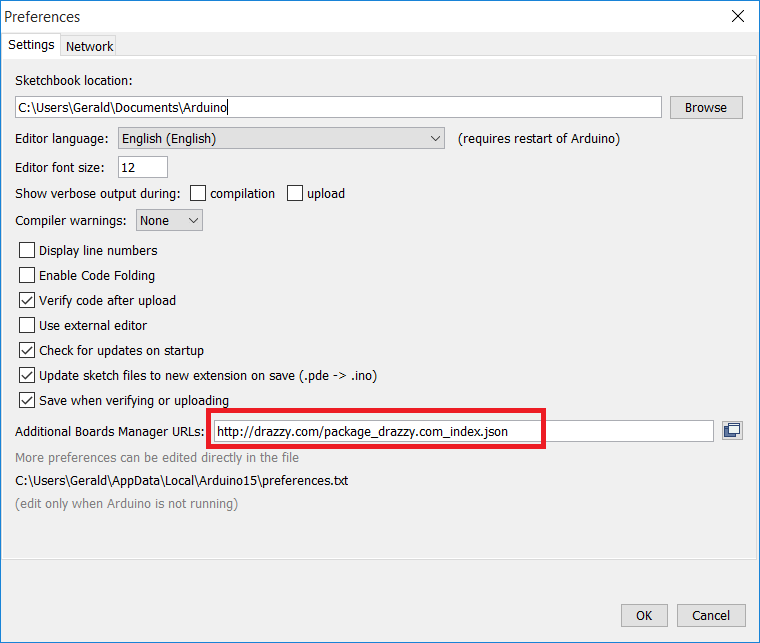
Add this additional board manager URL: http://drazzy.com/package_drazzy.com_index.json
Press ok and restart Arduino.
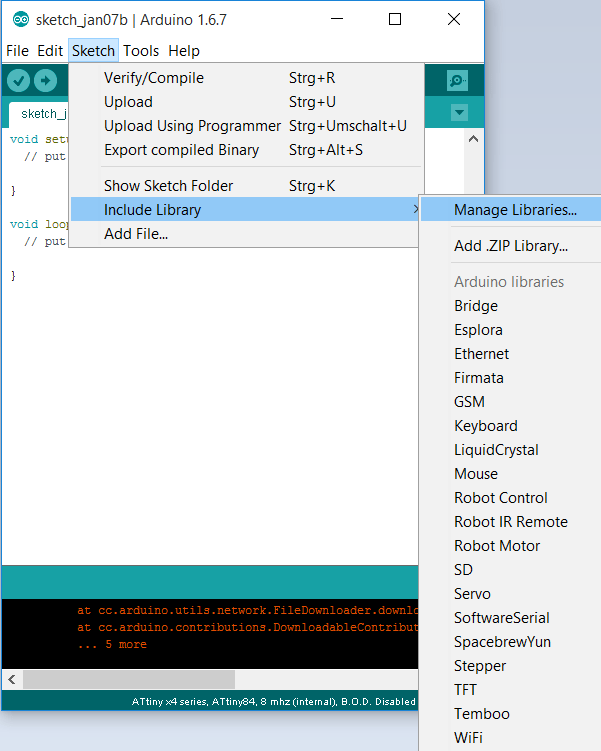
Now select include library and then manage libraries. A new window will be opened.
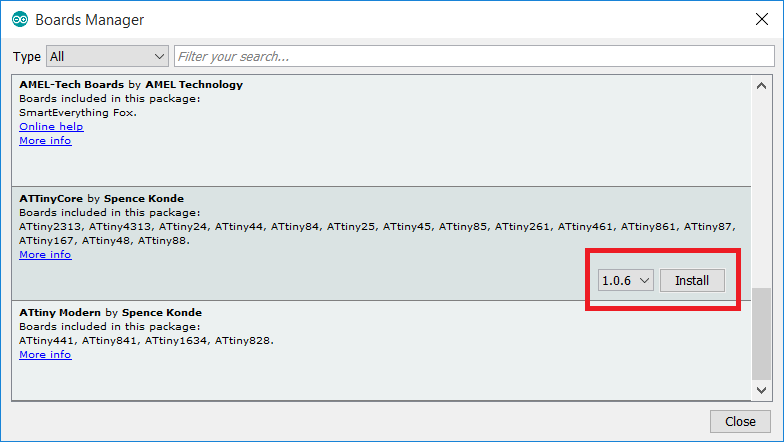
Now select the ATTinyCore and press install. Don’t use the damellis core, cause it doesn’t work with the JeeLib we install next.
Download the JeeLib from https://github.com/jcw/jeelib/archive/master.zip
Select Sketch -> Include library -> Add .ZIP library
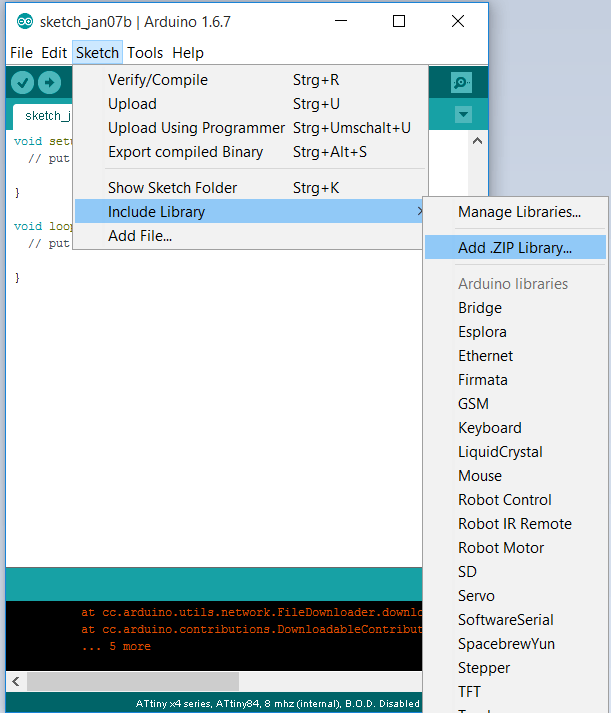
In the file dialogue select master.zip (the file you have just downloaded).
Now we have to tell the Arduino system which ATtiny we use. Click on Tools in the menu and then on Board. Now select ATtiny x4 Series:
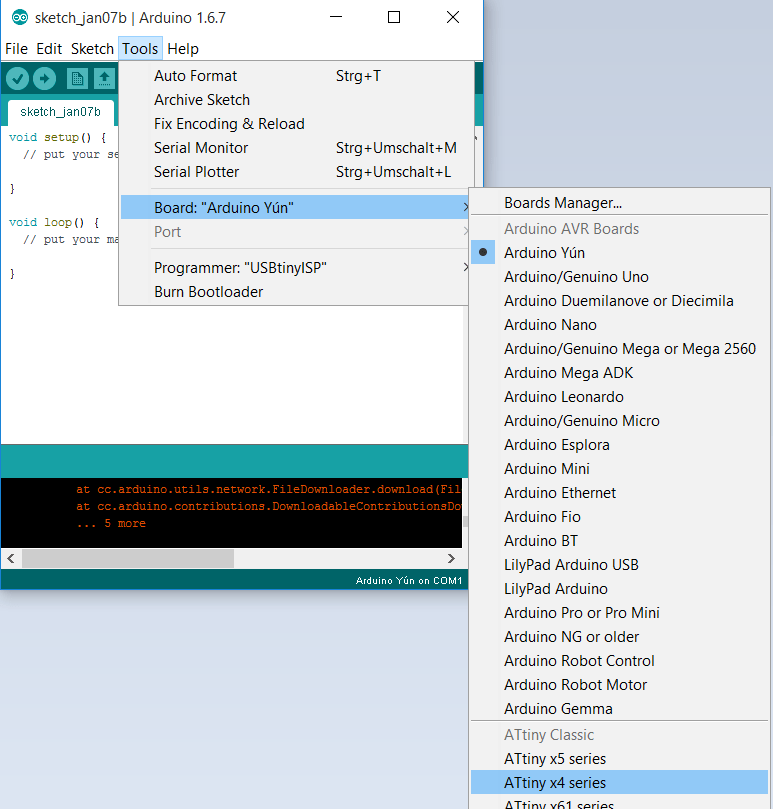
Within the Tools set:
- B.O.D.: B.O.D. diabled.
- Chips: ATtiny84
- Clock: 8 MHz internal
- Programmer: USBtinyISP

Installation with Arduino 1.0 IDE
To use the Arduino IDE for the ATTINY 84 (and other small AT processors) the following steps are necessary:
- Download the Arduino tiny core: http://code.google.com/p/arduino-tiny/
- Unzip archiv. Follow the instructions in the README file in tiny/avr
 More detailed instructions:
- http://harizanov.com/2012/08/setting-up-arduino-ide-for-working-with-attinys/
- http://www.instructables.com/id/Using-the-Arduino-Uno-to-program-ATTINY84-20PU/?lang=de
- http://openenergymonitor.org/emon/buildingblocks/attiny
- http://playground.boxtec.ch/doku.php/arduino/attiny (German)
Uploading a script with codebender
At the moment I encounter problems with codebender and Windows 10. Please use the Arduino IDE instead.
Codebender is a platform for programming Arduinos online. It has some great advantages over the Arduino IDE, eg. Tiny microcontrollers are directly supported, libraries are pre-installed. If you want to use the Arduino IDE follow this instructions.
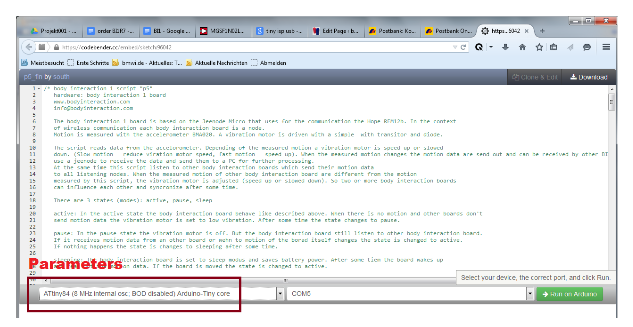
This link will open codebender in an new window:
https://codebender.cc/embed/sketch:96042
Connect you programmer and upload the script to the BI1 board. Select the programmer (eg. USBtinyISP), select ATiny84 (8 Mhz, tiny core) and press “Run on Arduino”.
The script reads data from the accelerometer. Depending of the measured motion the vibration motor is speed up or slowed down. (Slow motion = reduce viration motor speed, fast motion = speed up). When the measured motion changes the motion data are send out and can be received by other BI1. In addition you can use a jeenode to receive the data and send them to a PC for further processing.
At the same time this script listen to other body interaction boards which send their motion data to all listening nodes. When the measured motion of other body interaction board are different from the motion measured by this script, the vibration motor is adjusted (speed up or slowed down). So two or more body interaction boards can influence each other and synchronize after some time.

One thought on “How-to install Ardunio 1.6.7”