
In the fourth part of the tutorial we explain the development of a dashboard for our sex toy.
The series has 4 parts:
part 1: Exploring the internet of (sex) things
part 4: Building a sex toy dashboard with Node-RED
The dashboard is used to visualize certain data eg. the speed of the vibration motor and the movements of the vibrator. In addition it can have some control elements eg. for changing the vibration pattern.
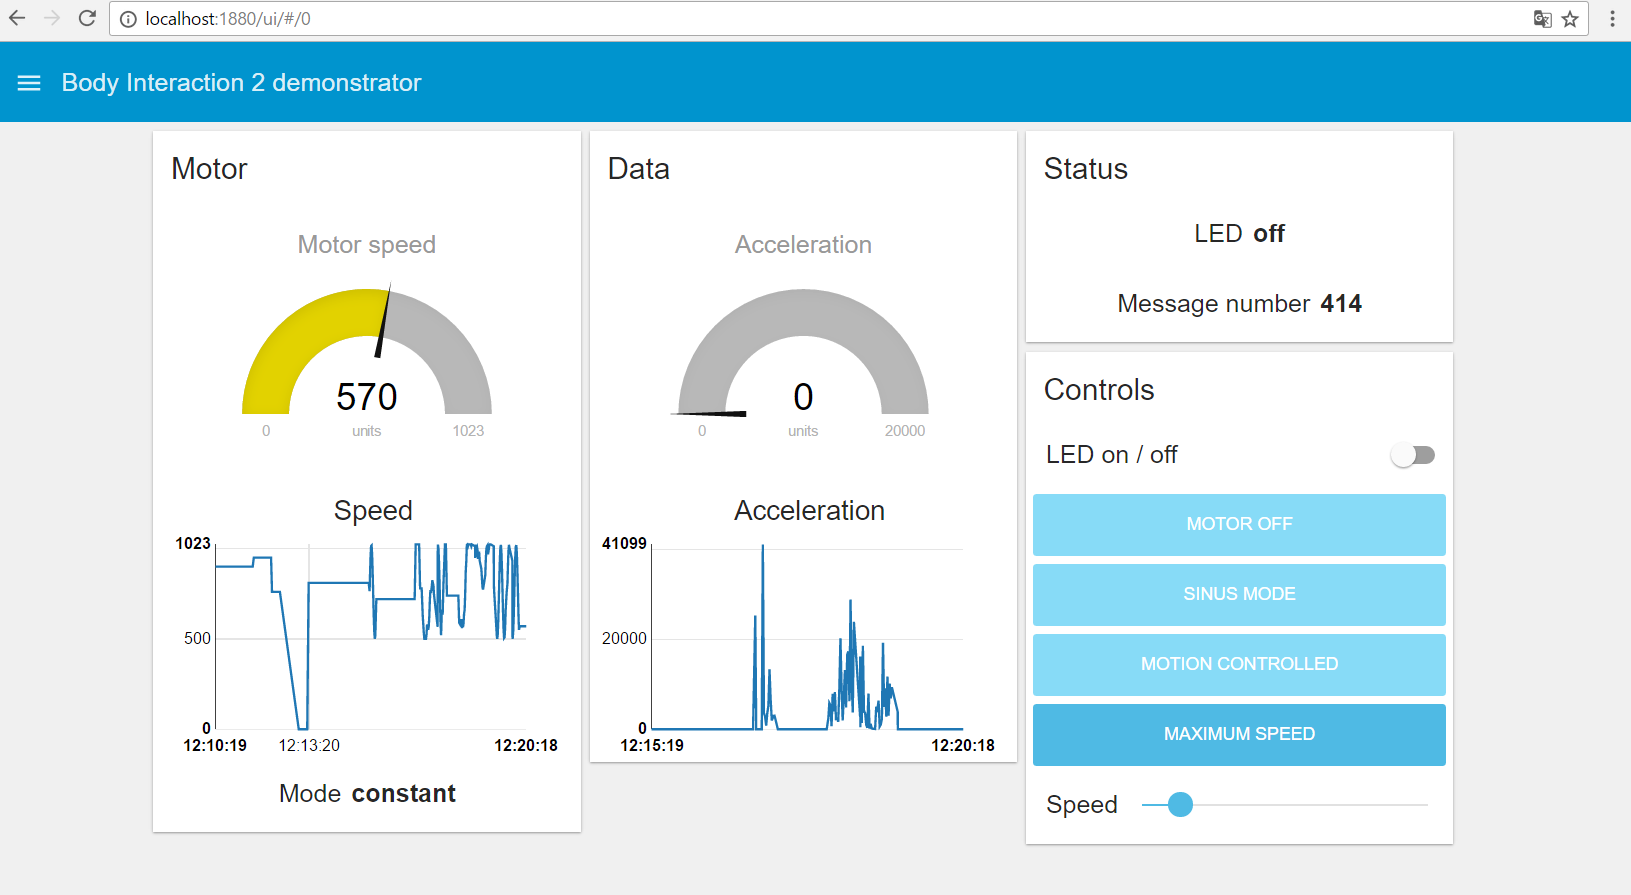
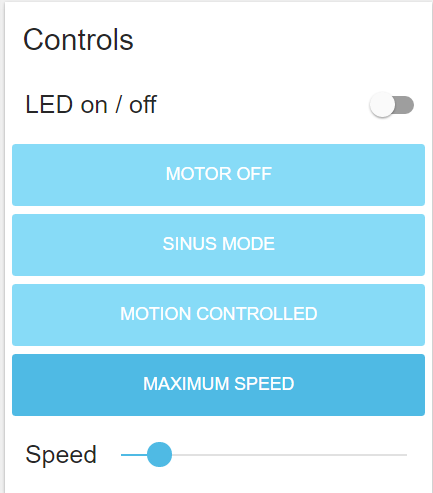
The window above is called a tab. You can have multiple tabs. The Motor, Data, Status and Controls – windows are called groups. The Controls – group has buttons to set the motor mode. In addition there is a slider which will set the motor to a constant speed. And there is an on/off button for the LED.
You have to install the Node-RED dashboard. Therefore you need at least version 0.14 of Node-RED. At the time this text was written the standard Node-RED installation is version 0.13 which is not sufficient for the dashboard.
Therefore check your Node-RED version. If it is equal or better than 0.14, skip this step:
- Download & unzip the latest version from github (eg. https://github.com/node-red/node-red/releases/tag/0.15.2).
- Now change to newly created directory eg “node-red-0.15.2”
- On Windows: Start a command shell in adminstration mode
- Execute “npm install” to install Node-RED.
If your Node-RED version is 0.14 or better install the dashboard:
- Download the Node-RED Dashboard: http://flows.nodered.org/node/node-red-dashboard
- Use the command shell and enter “npm install node-red-dashboard”
- Enter “node red”
- Enter the URL http://127.0.0.1:1880/ in your browser
Some remarks:
- If you don’t want to install Node-RED on your computer you could use the FRED Node-RED service. It has similar dashboard nodes and a lot more. It is free for a limited number of node.
- There is a very good tutorial which will explain different possibilities for creating a dashboard: http://noderedguide.com/index.php/2016/05/17/lecture-7-dashboards-and-ui-techniques-for-node-red/
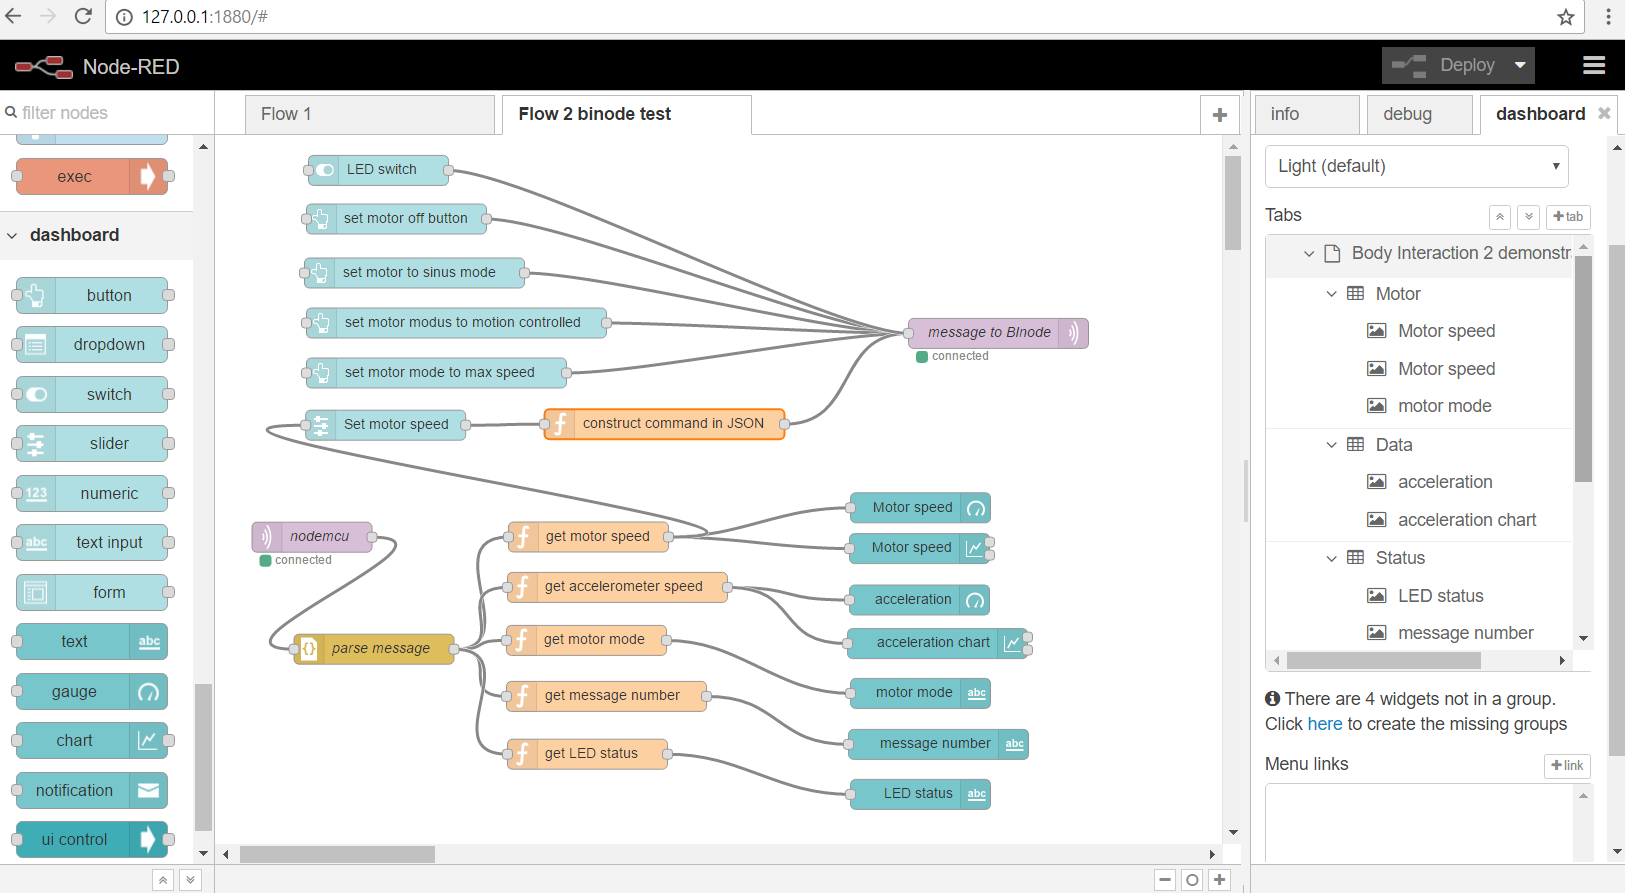
Let’s start and have a look at the new Node-RED interface: On the left side you will find the dashboard or user interface nodes. And on the right side there is new dashboard – tab. It contains all dashboard nodes which are used in the flow ordered hierarchical.
But where is the dashboard? Just open your browser and go to one of the URLs:
http://localhost:1880/ui/#/0 or
http://127.0.0.1:1880/ui/#/0
How can I get all the flows? You can download all flows here: bi-ui-node-red. Unzip the file and you will get a text file. Open the text file in an editor. Select the text and copy it to the clipboard.
Now we will explain two flows in detail.
Now go the Node-RED window, open the menu (it is on the left top side), select Import -> Clipboard.
A new window will open where you can insert the text (CTRL+V). Then press the Import-button.

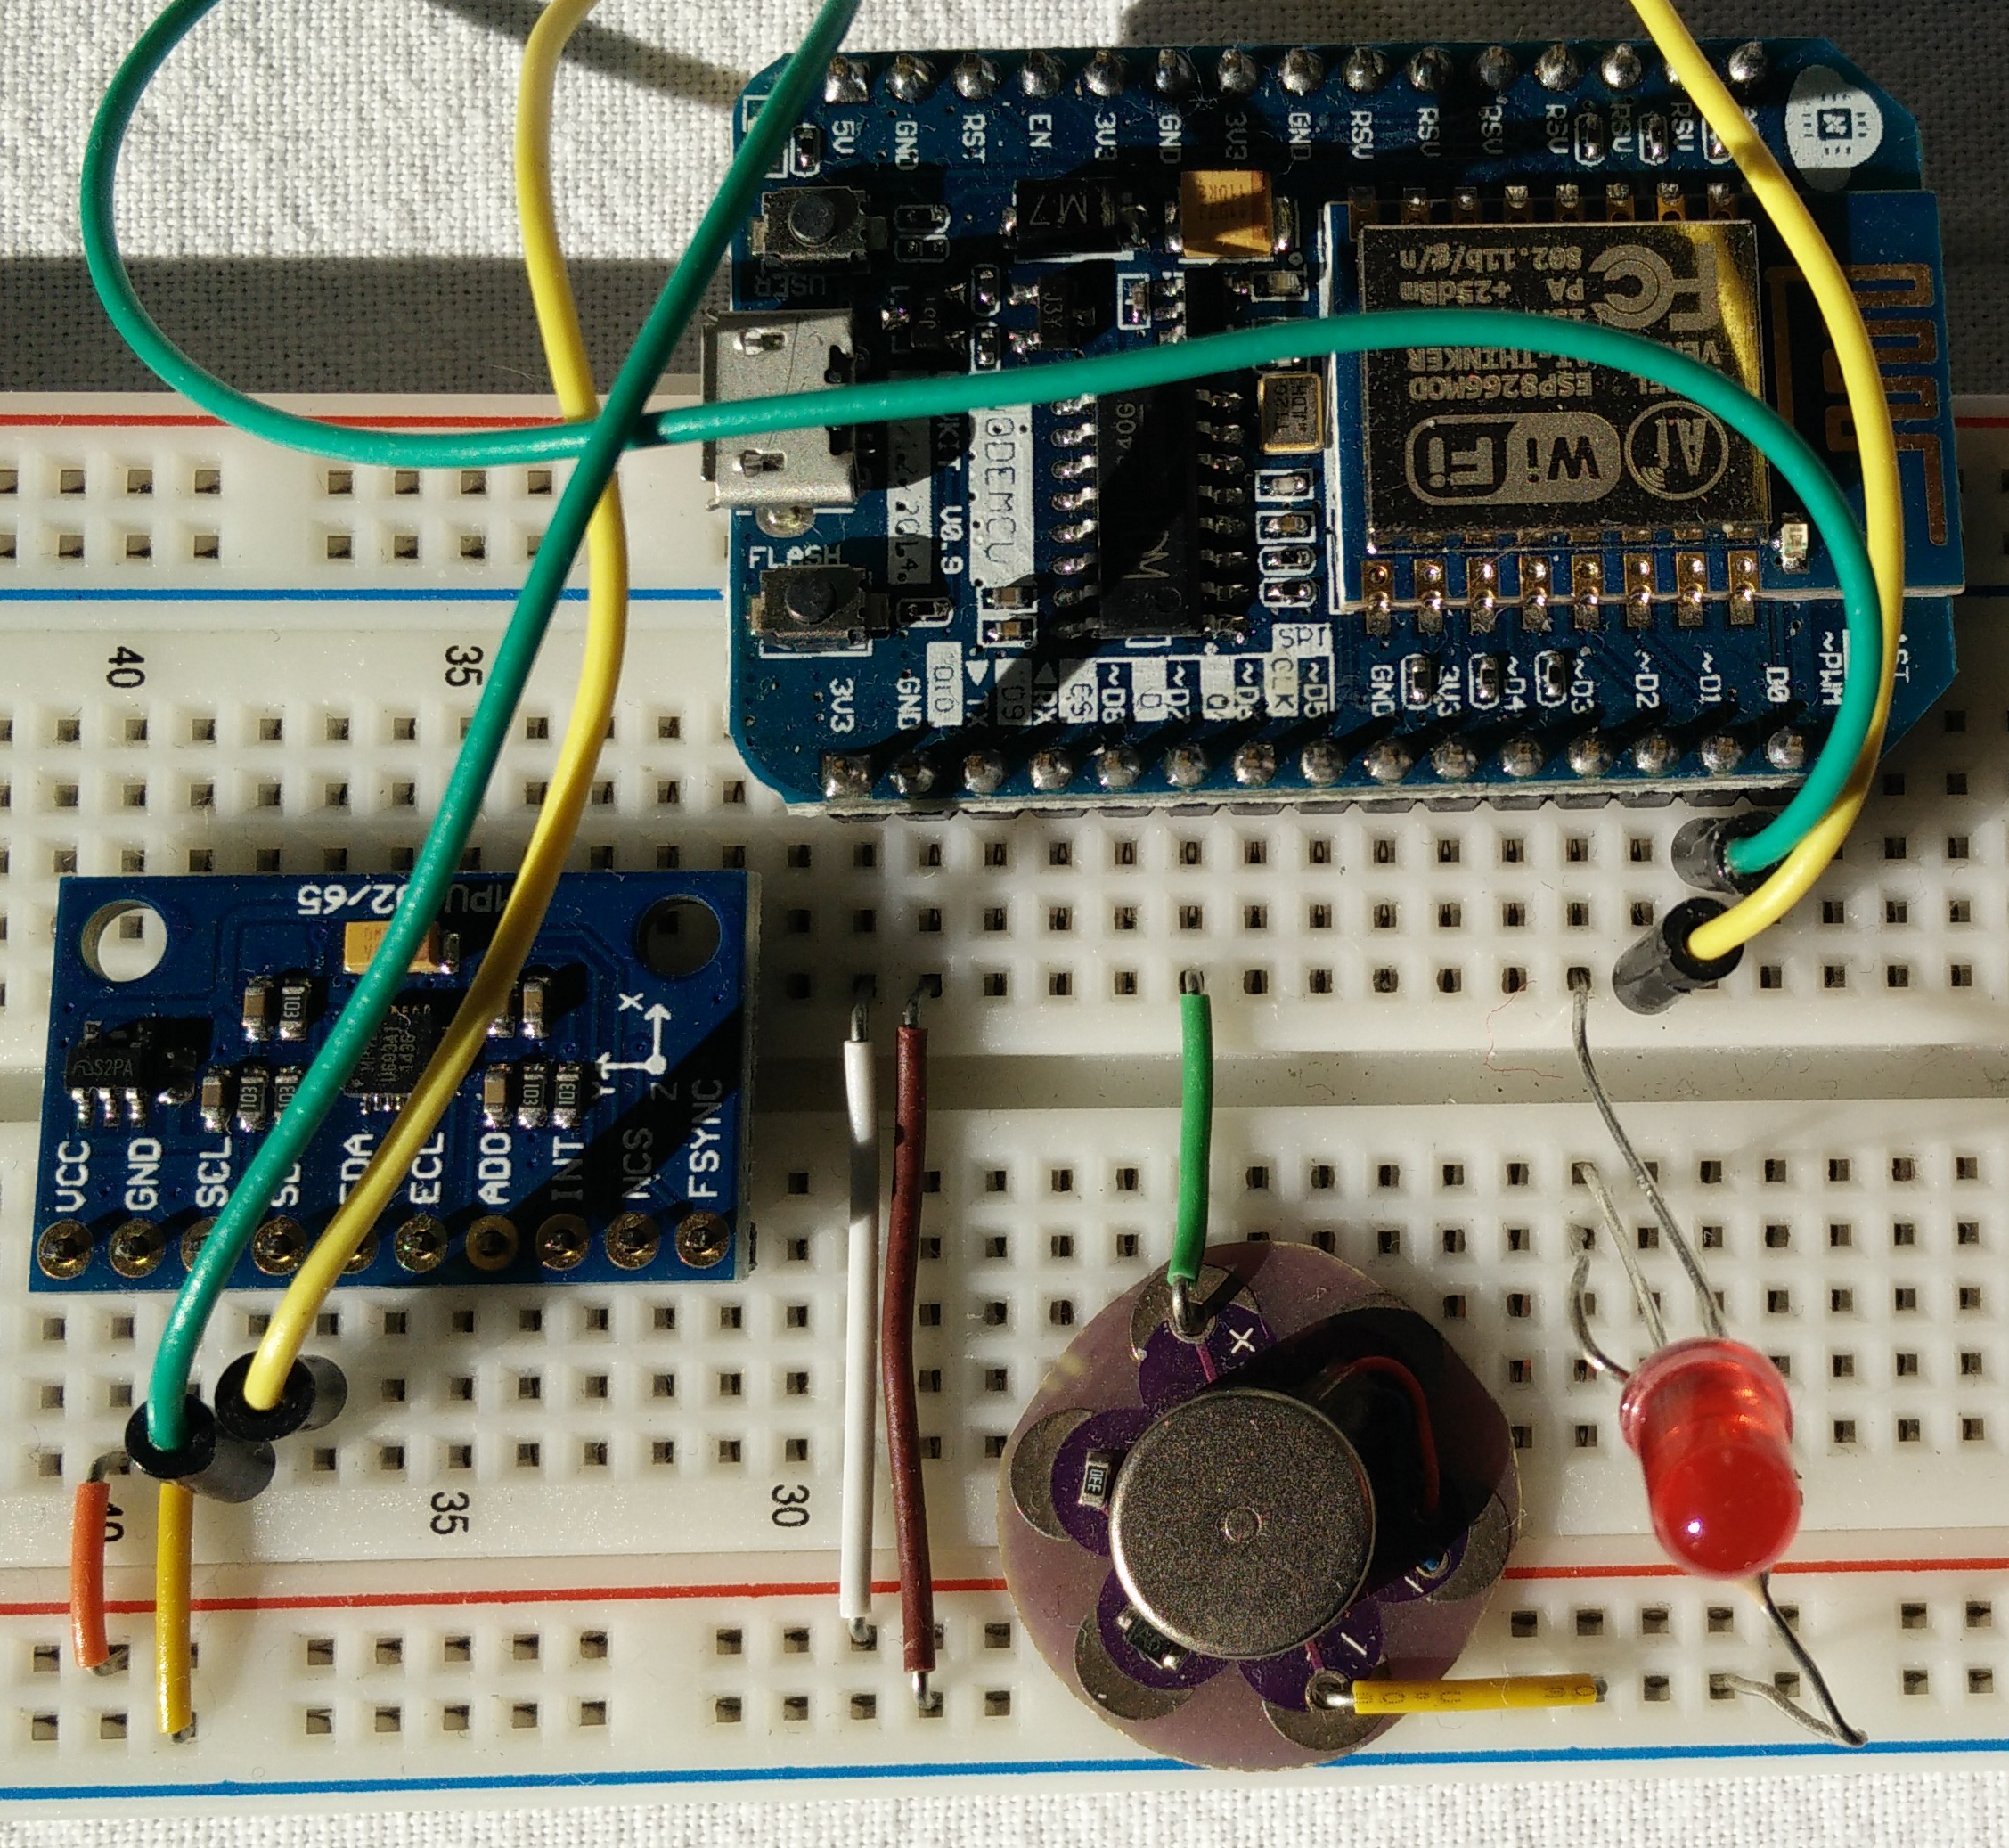 The Arduino sketch was updated for the dashboard. Please download the Arduino sketch from here: iost-part4-v12. Unzip the file. Compile and upload to your hardware (see part 1 of the tutorial).
In the first flow we will receive some vibration motor sex toy data which are sent by the MQTT protocol. We will display the data using a gauge and a graph element.
Let’ start with the MQTT input node. There is nothing new. Just connect to the MQTT server and subscribe the topic “BIoutTopic2” – which the sex toy uses to send out data.
Now add the function node “JSON” which will parse the incoming message and places the result in “payload”.
But we want to know the motor speed only. Therefore we need a function node which passes the vibration motor speed as payload and deletes all other data. Please use the following JavaScript code:

To display the speed we need to more nodes. The gauge node 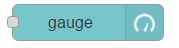 displays the actual speed. Connect the gauge node with the function node. You can add the range – the minimum and maximum value (0 and 1023).
Now add a chart node  and connect it with the function node, too.
Next we want the chart node and the gauge node to be together as shown in the next image.
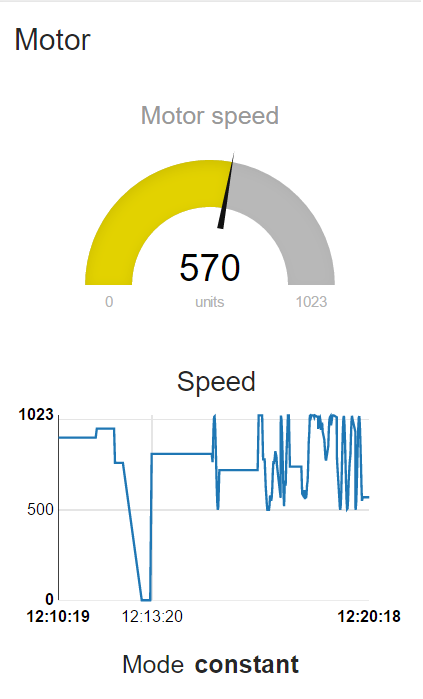
We have to make a group and put both nodes into the group. Have a look on the dashboard at the right side. Make a new group and move the gauge and chart node below the group called “Motor”.

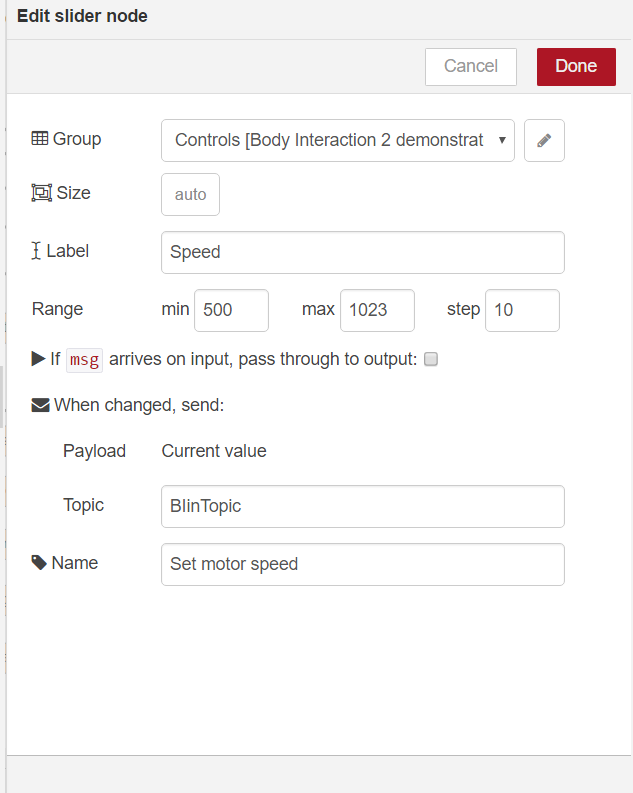
 Now we explain the second flow. It is used to send commands to the sex toy. We will use a slider to control the speed. But there is one problem: the slider should display the actual speed of the vibration motor. Therefore we manipulate the slider. To display the actual motor speed we have to move the slider appropriate to the actual speed. The slider will be part of the control group:
Now get the slider node and edit the node as follows:
Then connect the node with the “get motor speed” function which was introduced in the first flow.
 Finally comes the trick part. Get a new function node and connect it with the slider. This node will construct the JSON message which will be sent to the sex toy using MQTT. The JavaScript code of the function node is as follows:
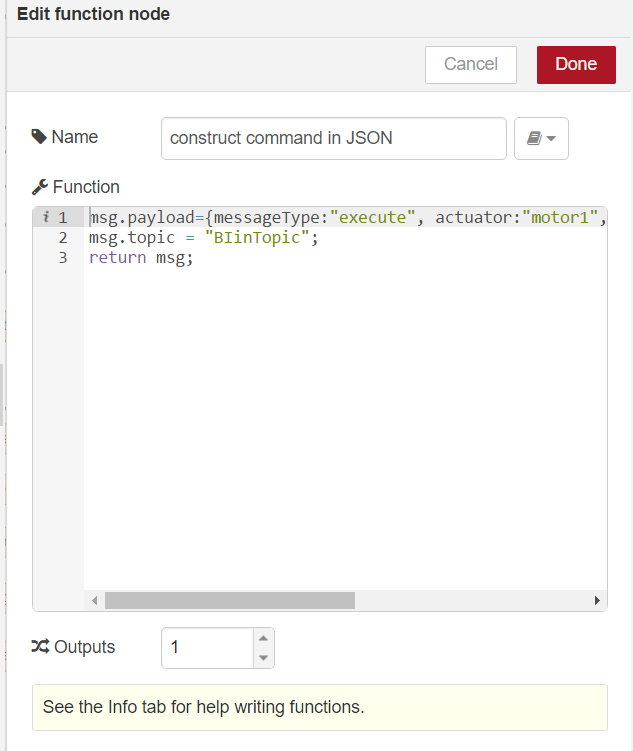
msg.payload={messageType:"execute", actuator:"motor1",
             actuatorMode:"constant", actuatorValue:msg.payload}
msg.topic = "BIinTopic";
return msg;
Now connect the function node with a new MQTT output node. Leave the topic empty as it will be passed from the input nodes:

Using Node-RED with the Node-RED dashboard we are able to make a user interface for our sex toy(s). We could easily display the motion of the sex toy as well as the vibration motor speed. You could argue that we had a (very simple) user interface already in part 1 of the tutorial, without having to use MQTT, Node-RED and the Node-RED dashboard. That’s true. But imagine you have several sex toys and want to control them. You could easily add a tab in Node-RED for each sex toy. Or you could build more sophisticated flows incorporating several sex toy. Why not interconnecting the vibrating necklace with a penis ring and one of the plugs or dildos?
There are a lot of flows and nodes already available at http://flows.nodered.org/. (Of course not in the sex toy domain)
Why not play music for a given sex toy vibrator mode? Or control the sex toy using another IOT device…
