Tag: silicone

Basic Node for the Internet of Sex Toys – part 2: 3d printed form, assembly, molding

In this series of posts we describe how-to make a vibrating sex toy which is part of the Internet of Things.

part 1: Basic Node for the Internet of Sex Toys

part 2: Molding the Basic Node

part 3: Software for the Basic Node

In part 2 we describe how-to make a mold form for the basic node. We need three forms:

  • the mold form which consists of two parts
  • the inlay which protects the electronics of the basic node
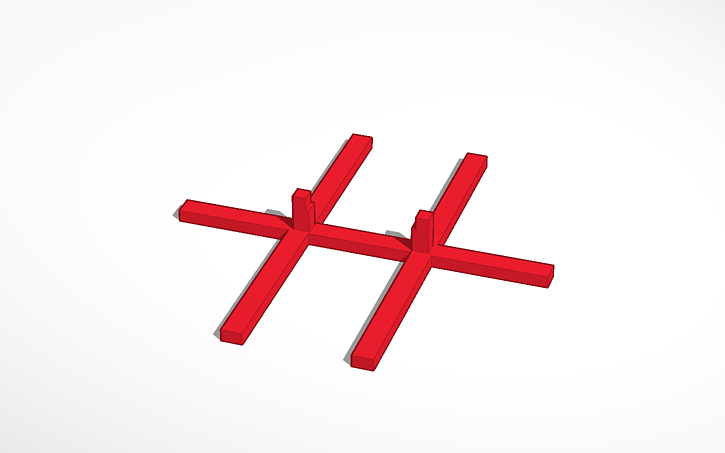
  • a “hanging” for the inlay


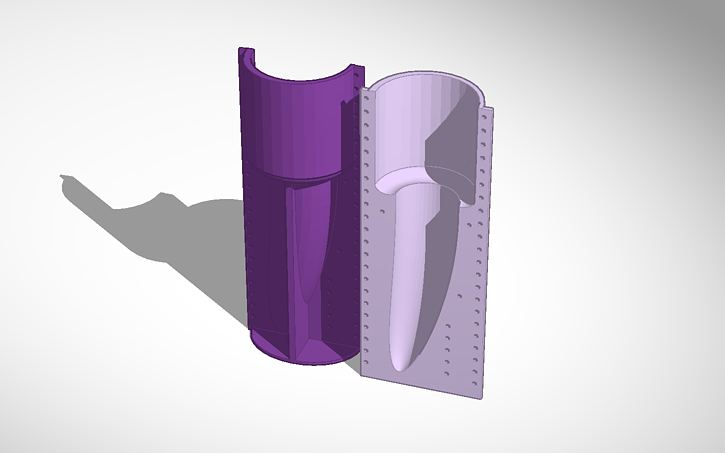
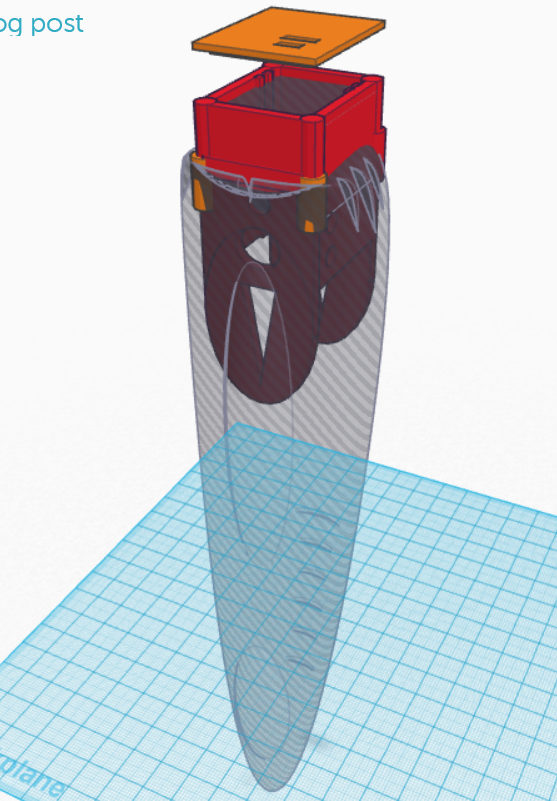
We used Tinkercad to construct the parts. The molding form is based on Tinkercad’s banana form. You can edit and share them from your browser:

Inlay: https://tinkercad.com/things/h5fFOBqlmjw

Hanging: https://tinkercad.com/things/jUxc2oAamww

Form: https://tinkercad.com/things/6HS3XScOsCM

Instructions

Print out all forms. The STL files are available at Thingiverse. You might want to use XTC or similar for smoothing the inner part of the mold form.

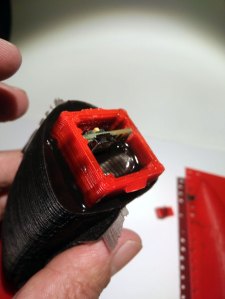
Assembling the Inlay

We use the inlay to protect the electronics.

Simply put the electronics inside so that the upper body of the switch is on the same level as the upper inlay. We use hot glue to fix the basic node.

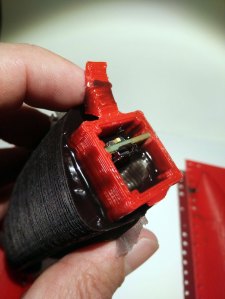
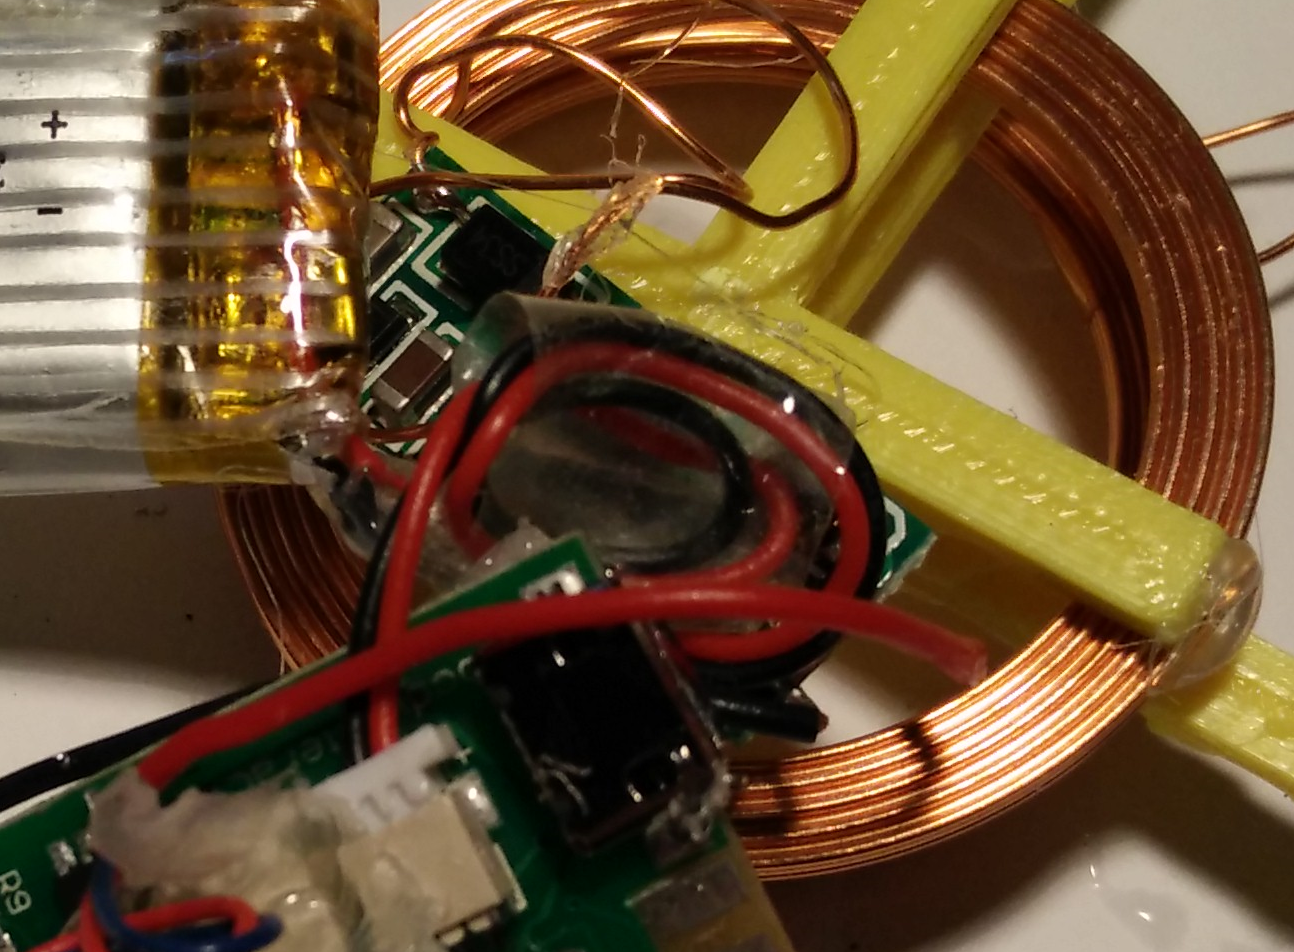
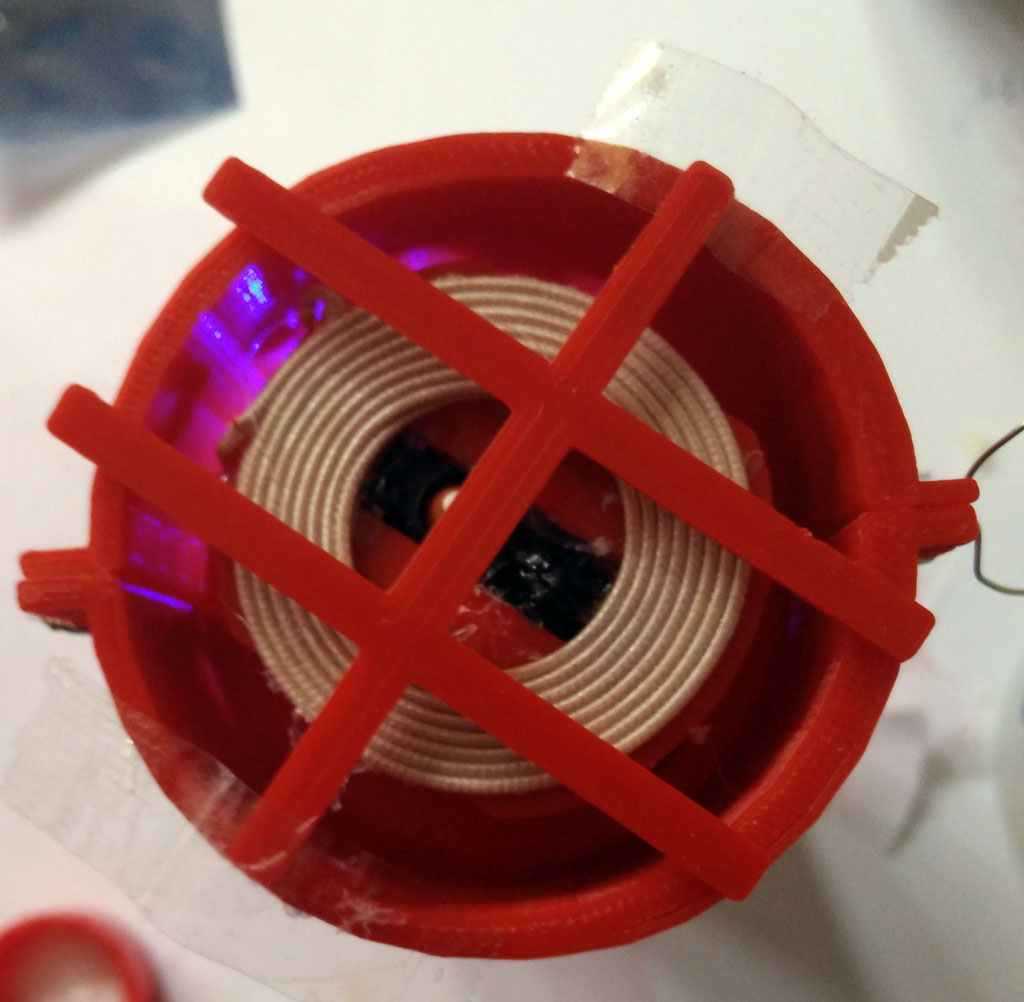
Then fix the receiver coil of the wireless charging module on top of the inlay. The next step is to fix the hanging at the inlay.

Now fix the LiPo battery on the bottom side of the inlay using hot glue or similar. Fix the wires. Finally you might fix the wires of the vibration motor next to the middle of the LiPo battery.

Use tinkering wire to fix both parts of the molding form.

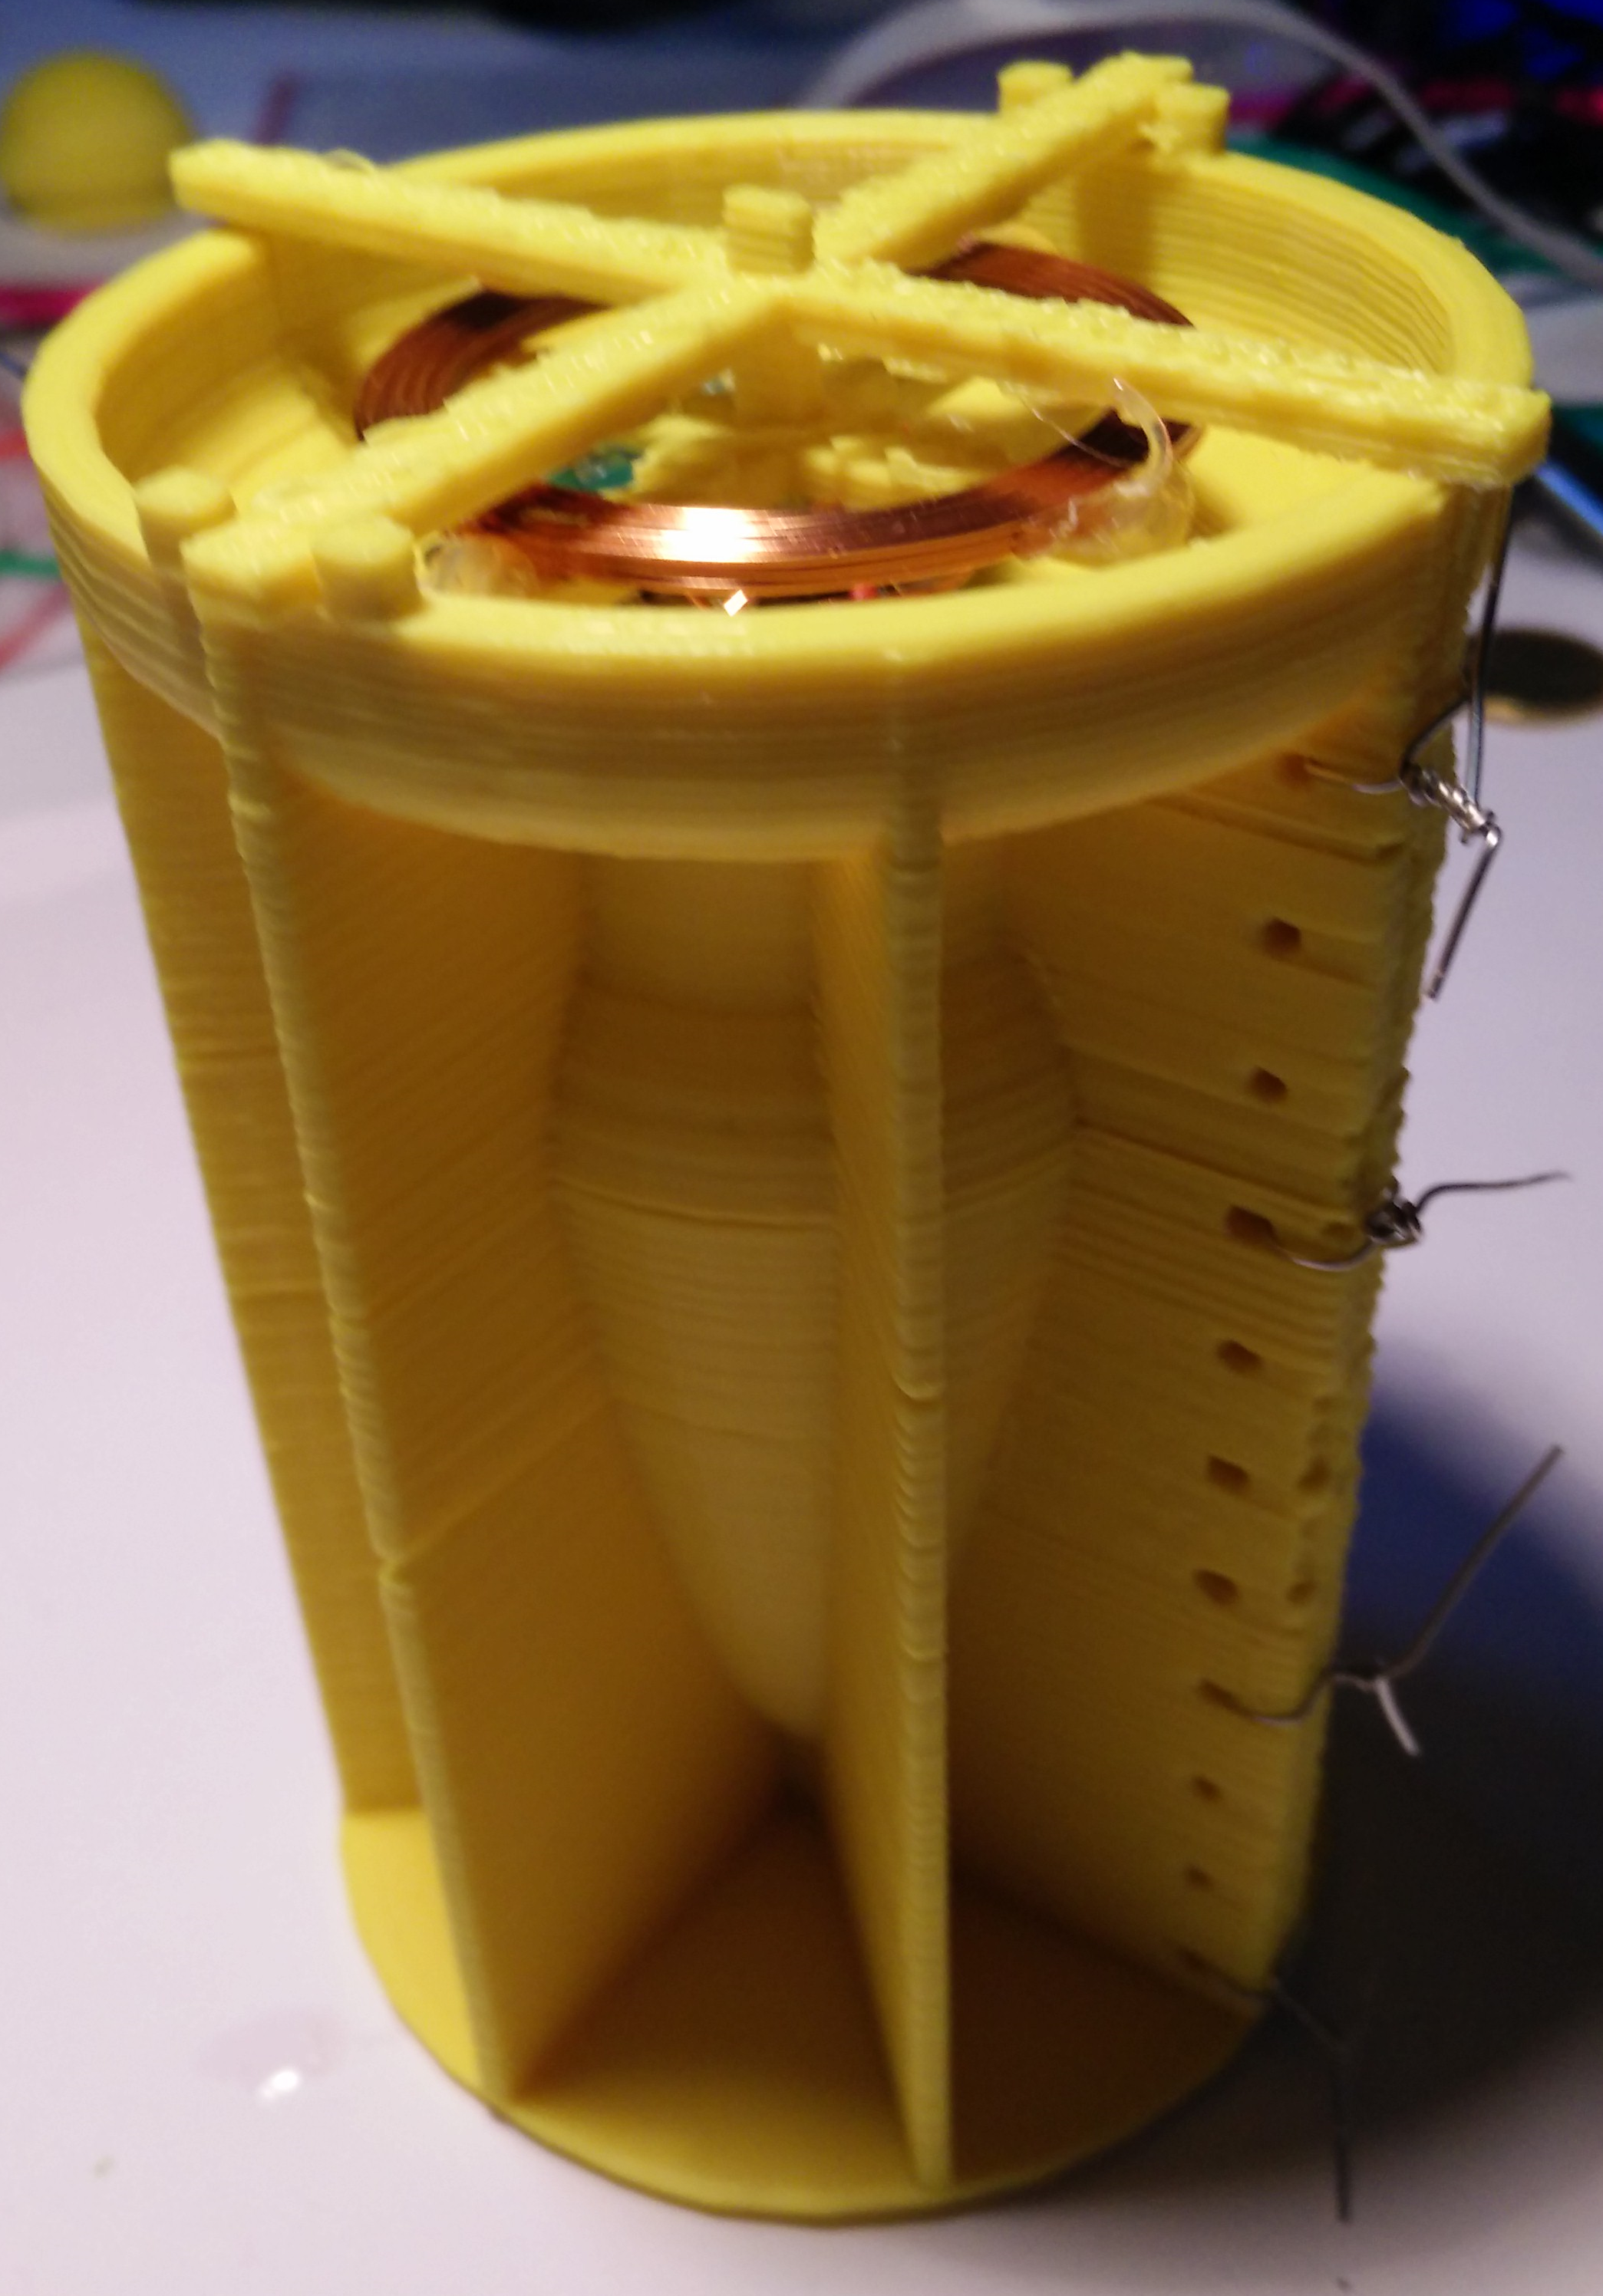
Put the inlay in the form. Fix the hanging with a tape or similar. The motors shouldn’t touch the inner part of the form.

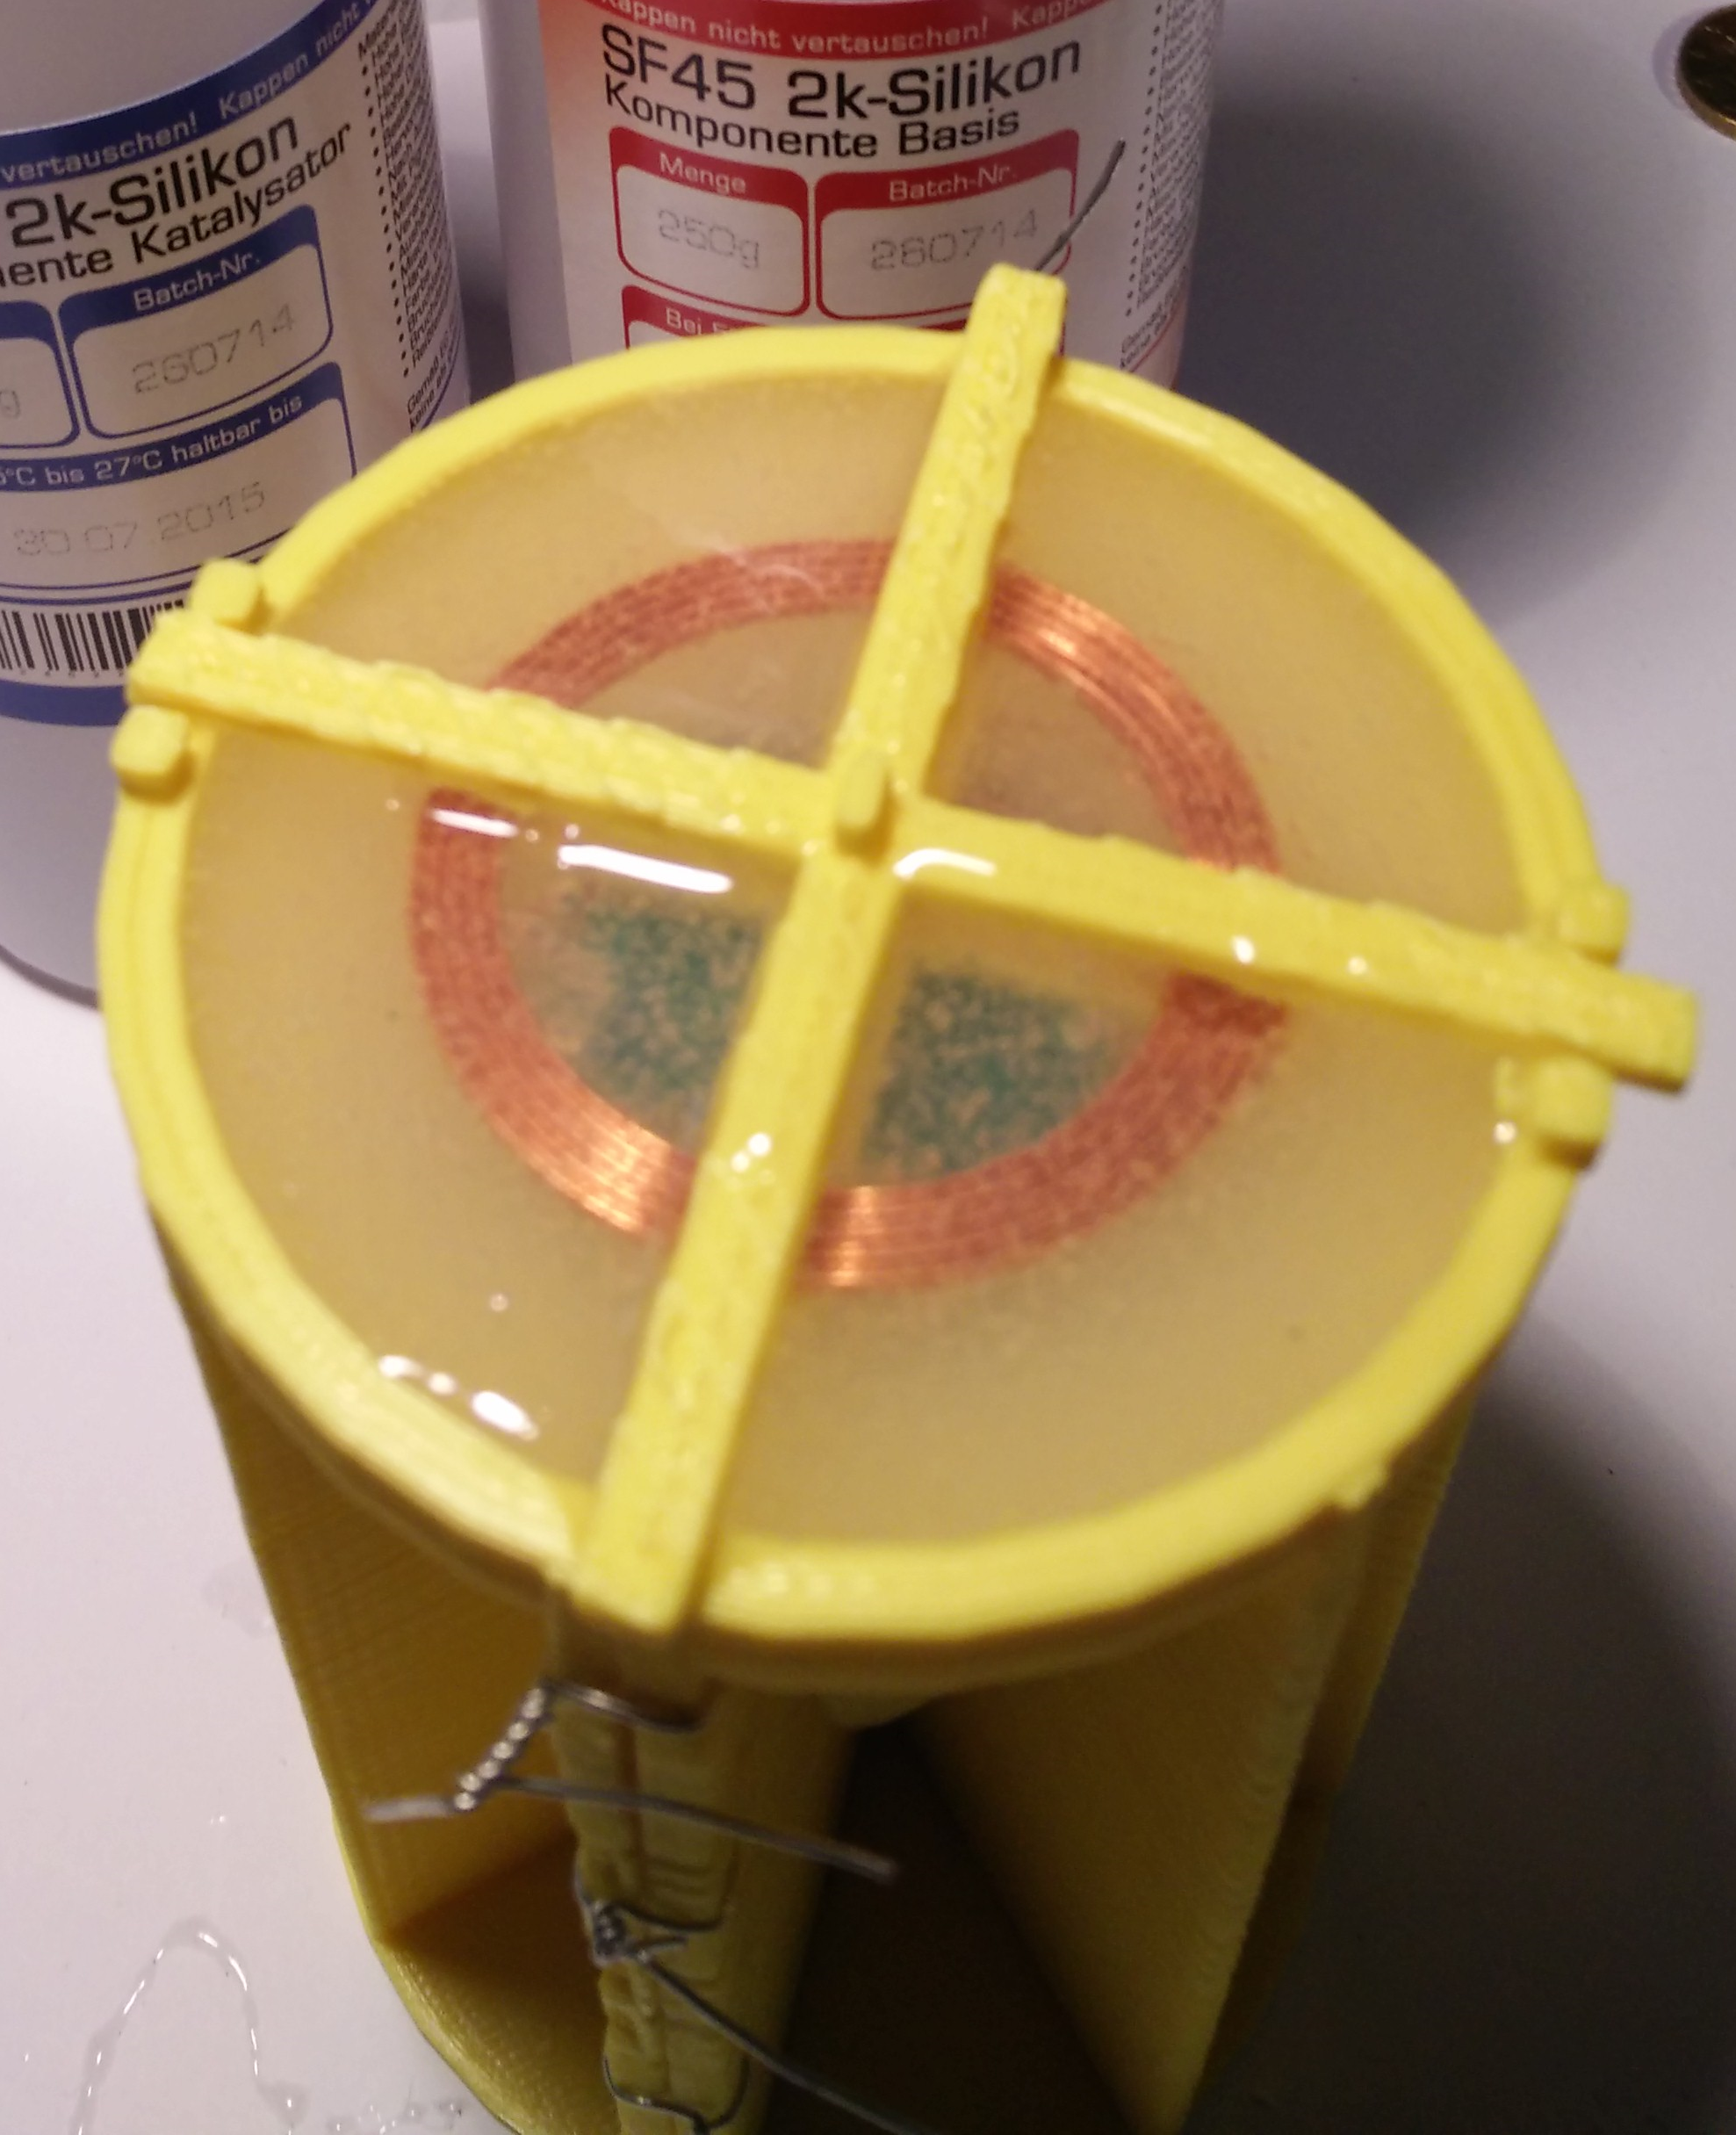
Now prepare the silicone. We use Shore A 45 silicone (approx. 250 ml) from Silikonfabrik.de. It is hard but still a bit flexible. You may add color, too. You have about 10 minutes to stir the silicone and poor it in the form.

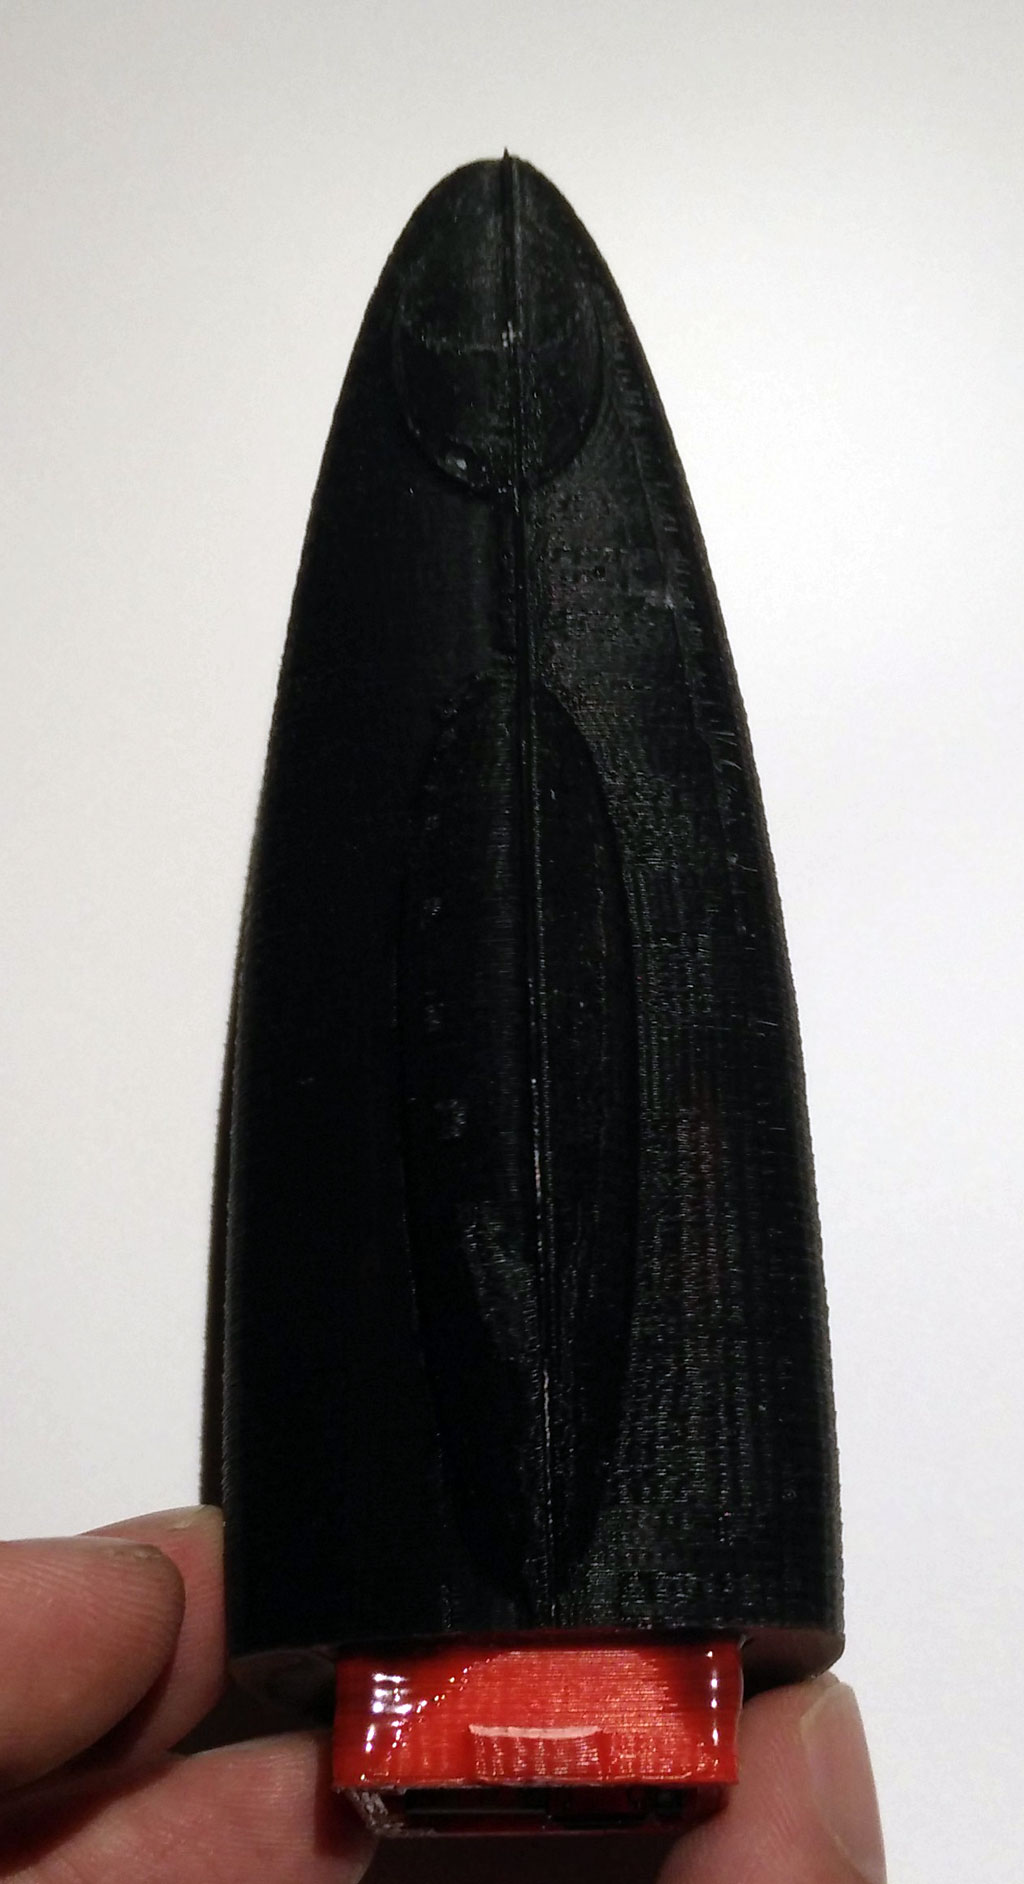
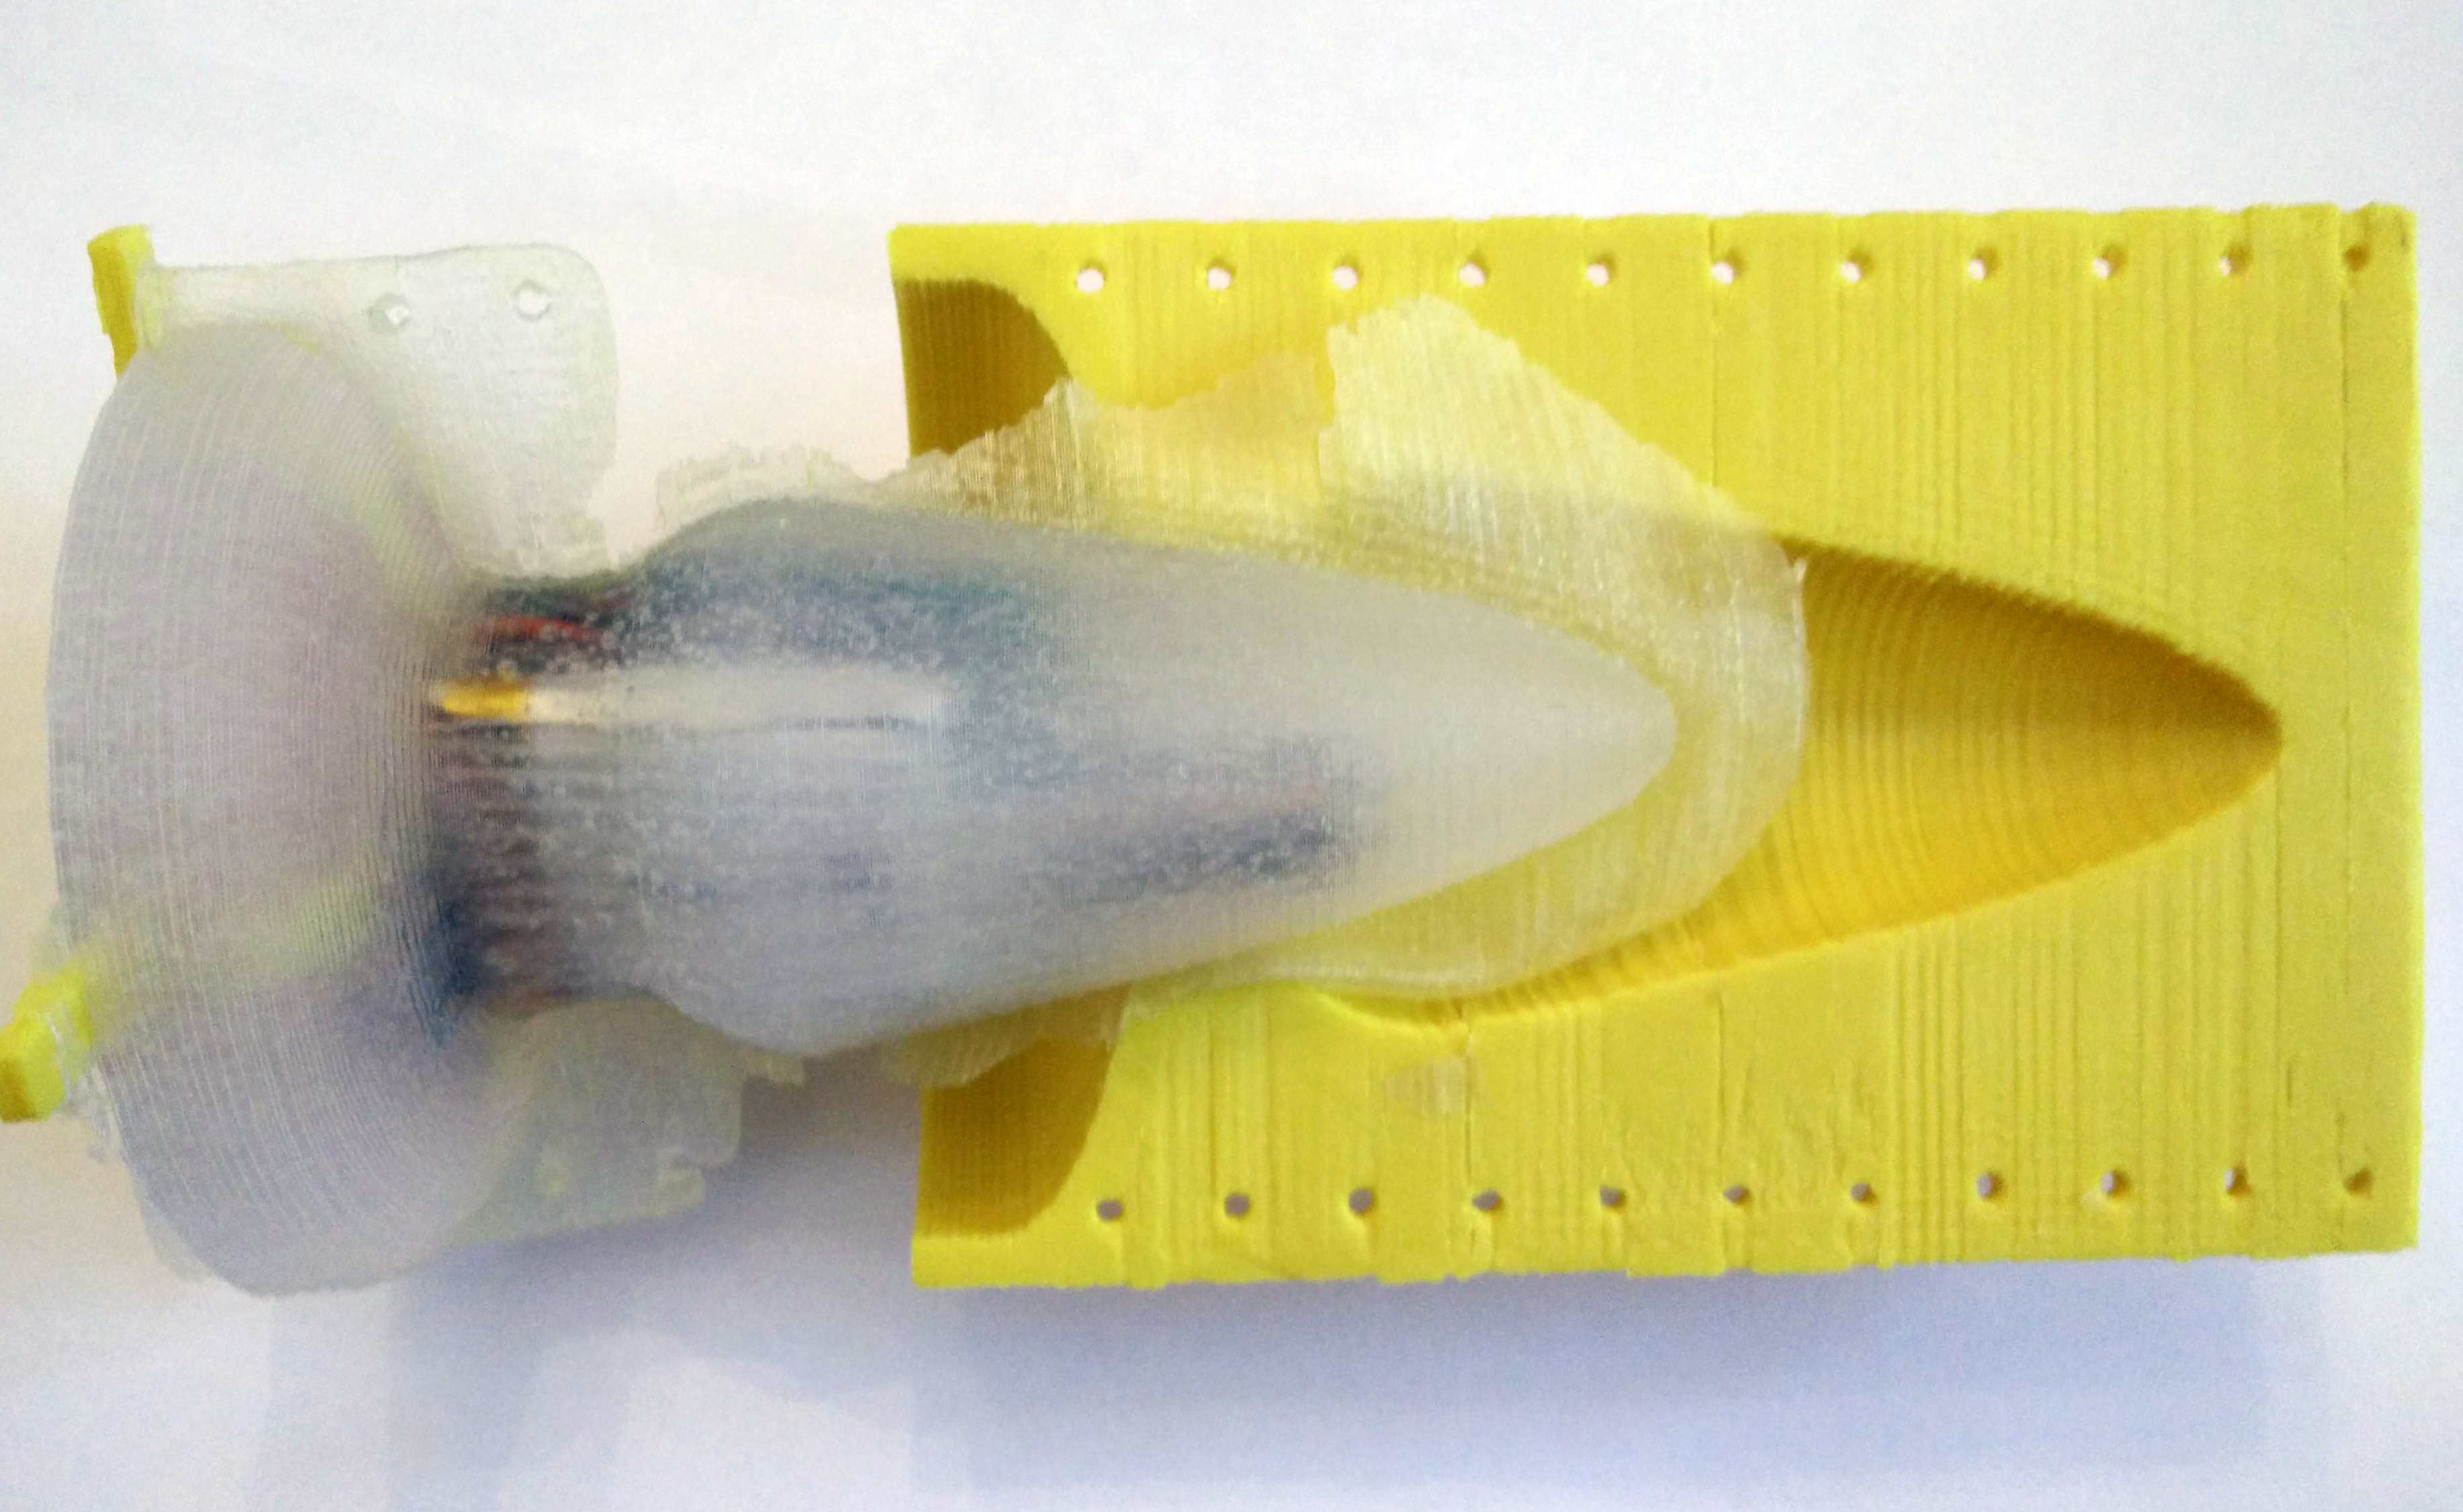
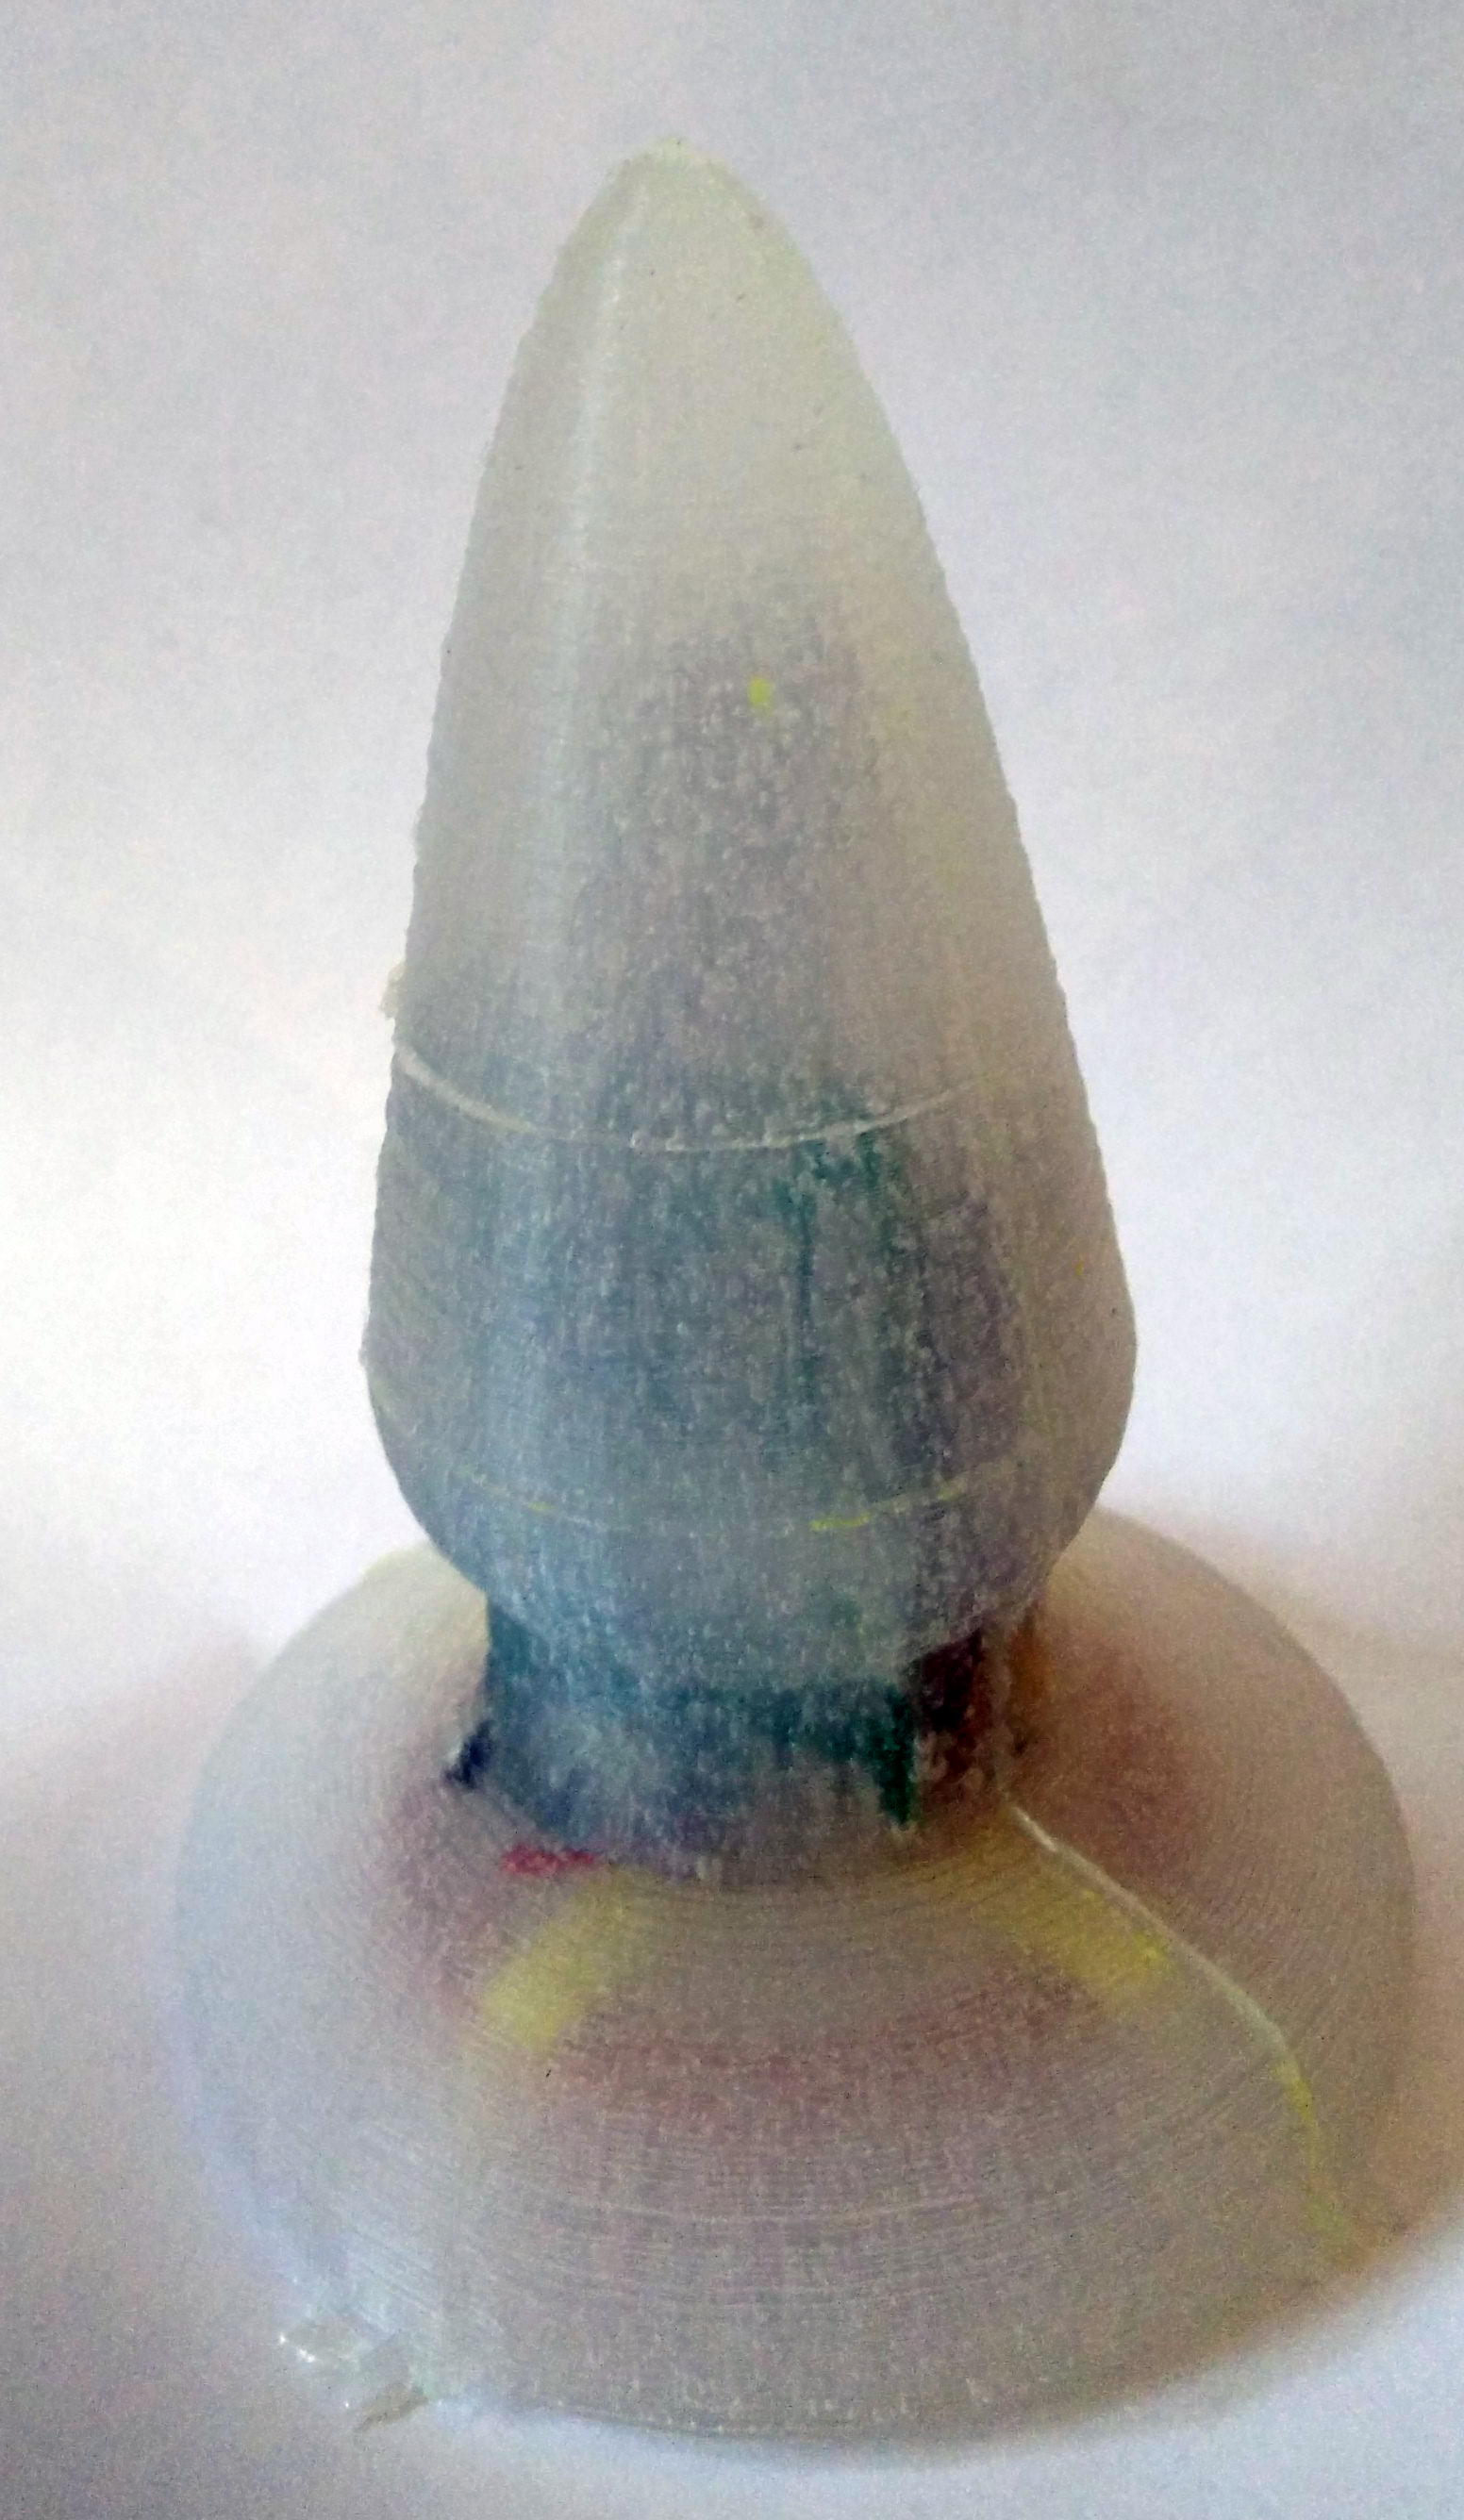
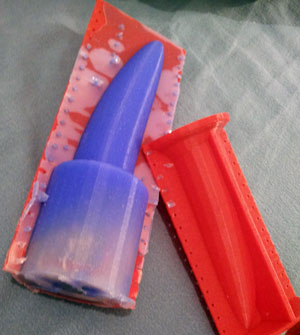
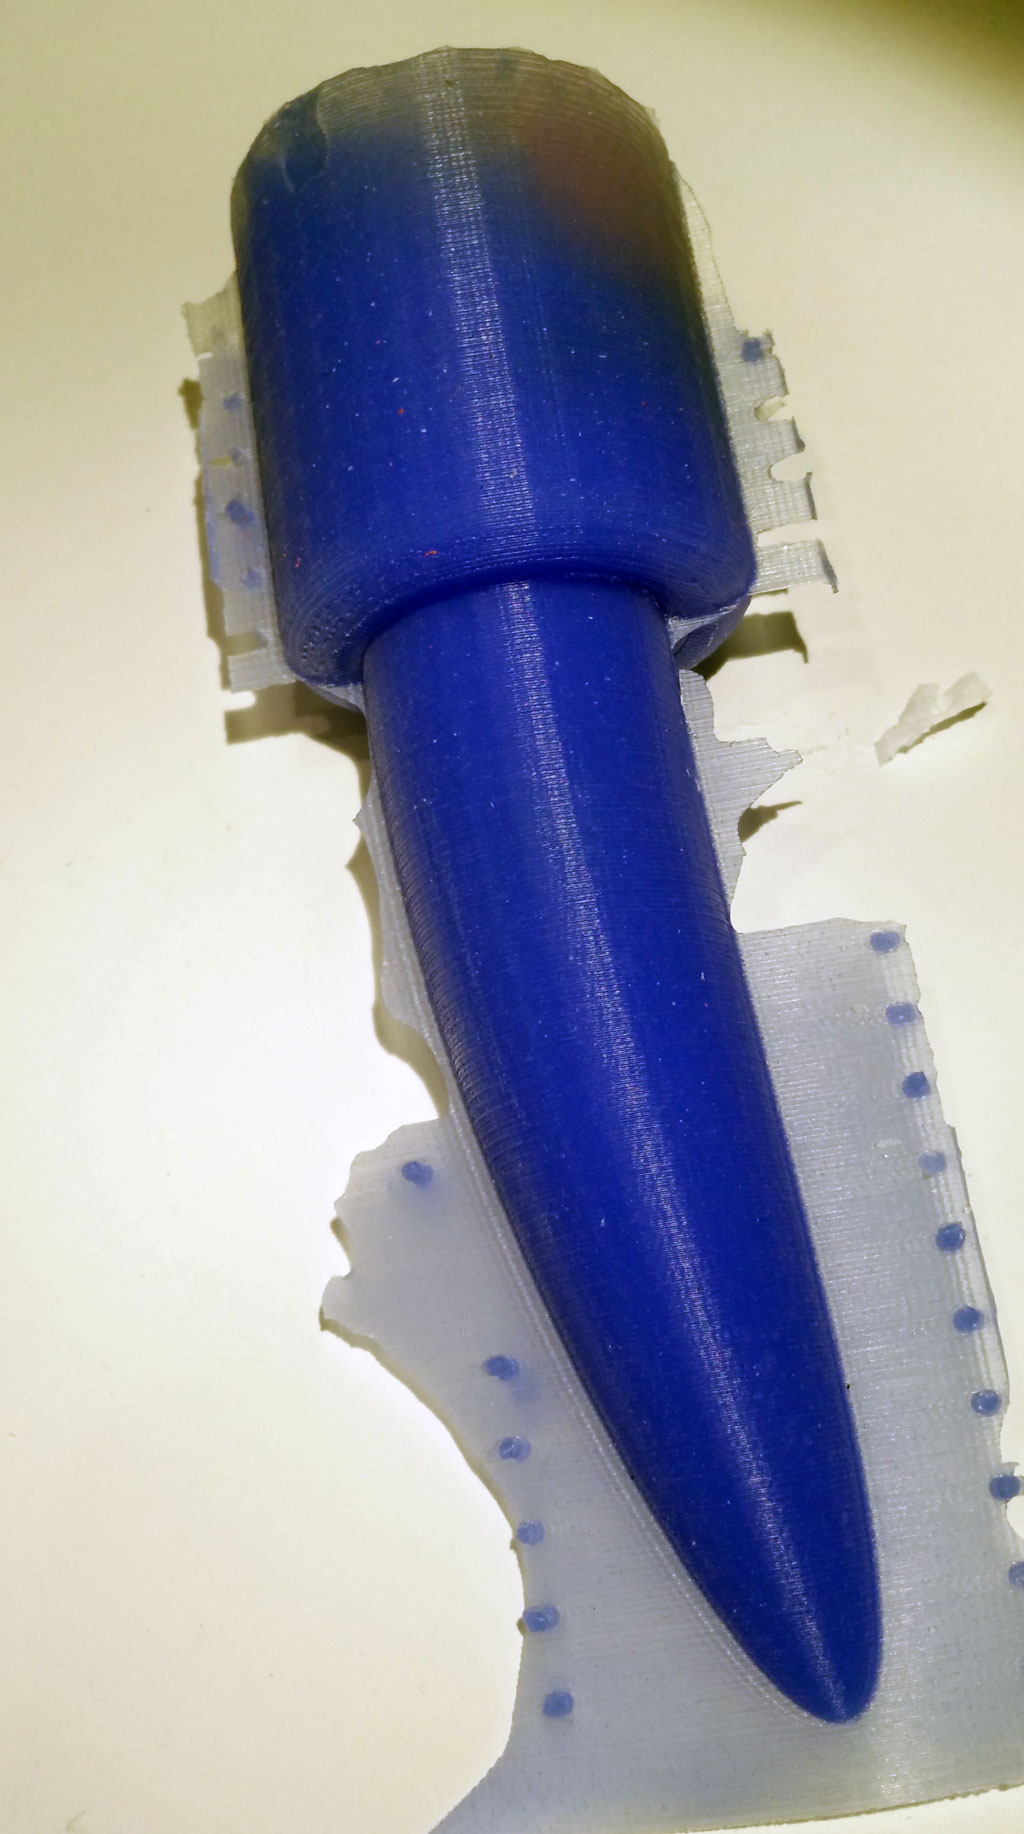
After some hours you can remove the form. As you can see there is overhang which make removing the form very hard. The form could break when removing. Better preparation of the form (eg rasping) could improve the results.

If the blue LED of the Wemos board is still active you were successful.

Now you need a charging station. The construction is shown here. It is also possible to connect the sender (or transmitter) module with a 5V power source (eg. from the USB port). Just put the bottom of the molded basic node on the sender coil.


In the next part we introduce an updated version of the software including over the air update and WiFi management.

Smooth 3d printed vibrator form for silicone molding

shinybluemoreorlesscompleteWe started with printing sex toys (see here, here and here), then moved to printing mold forms for sex toys and finally we made sex toys which are partially silicone molded and partially printed. The best results were achieved with printing mold forms and fill them with silicone. But even there we have the problem that the surface isn’t really smooth and that it is hard to clean.


xtcTo overcome this problem we use a 3d print smoothing (XTC 3D) to smooth the surface. Application is very easy. It is like applying a transparent varnish. The results are impressive: The silicone gets a smooth shiny surface.

Shiny blue vibrator with vibration motor and air bubble in silicone form
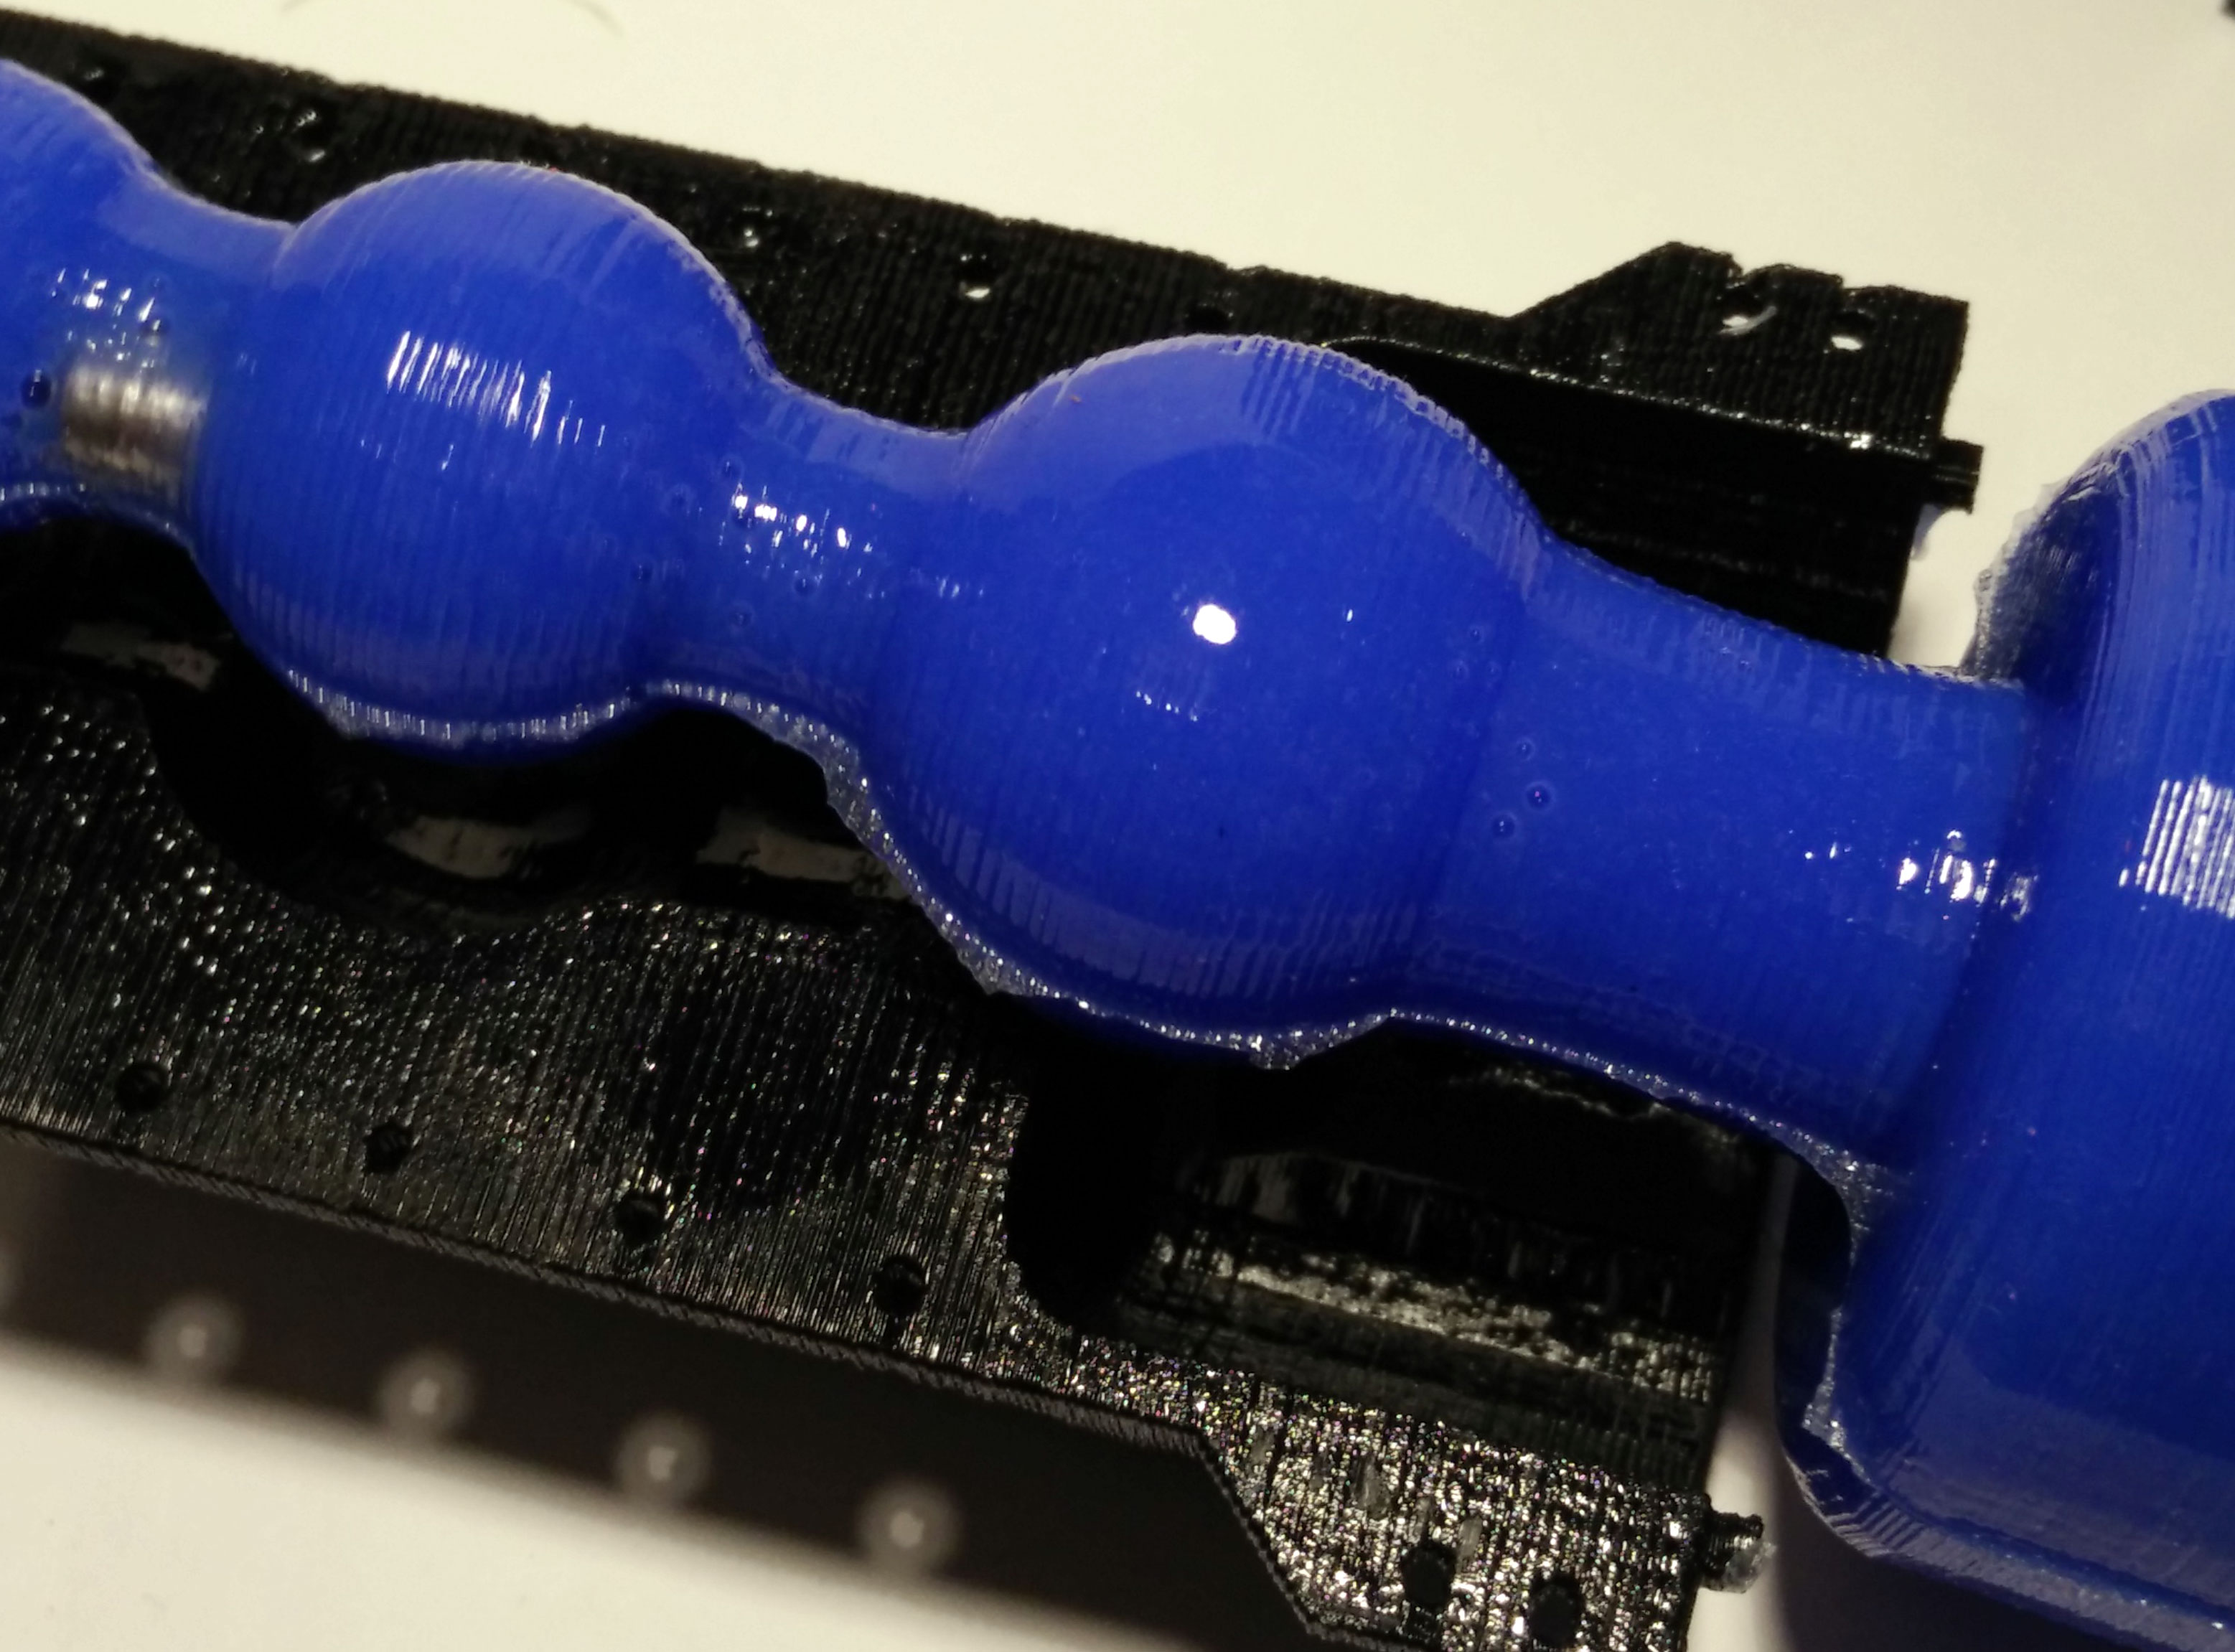
But you can still see printer artefacts. To overcome this issue you could apply a thicker layer of XTC-3D. If you use a better printer than my daVinci 1.0 the “staircase effect” shouldn’t be a  problem at all. Another problem are tiny – sometimes quite large – air bubbles. To remove this air bubbles you need a vacuum chamber. So it is still not perfect, but it works and looks quite good…shinybluecomplete

New small fusion vibrator

fusion-small-side-viewThis is a small version of the fusion vibrator. The small fusion form for molding can be made with 3d printers with smaller volume. In addition the inlay for the body interaction development board is reduced in size, but there is still enough place for board and battery. Only about 120ml silicone are needed. The form was constructed in Tinkercad.

Modify the form in Tinkercad: all forms, inlay only, form only

Download the STL files for printing: round_something_06_final_inlay_improved. There are some artifacts but printing is fine on the daVinci 1.0.

Download and discuss in Thingiverse: http://www.thingiverse.com/thing:1589075

round_something_06_final

Please follow the instruction from the large fusion vibrator. When you poor the silicone into the form it is very important to keep the USB connector free from silicone. Even very small amounts can cause the USB connector to break apart from the board.  When the USB connector is broken then you cannot recharge the vibrator. Also be always very cautious when you plug-in or plug-out the USB connector.

Finally you can remove the overhanging parts from the inlay.

fusion-small-top-view


New fusion 3d printed and silicone molded vibrator

fusion tinkercadThis is the initial design. The round curved form will be in silicone with vibration motor within (vibration motor not shown on sketch). The red part is 3d printed. It is the enclosure for the body interaction vibrator development board and LiPo battery. You can plug-in the Micro USB connector for battery charging. In addition there is an on/off switch e.g. for travelling.

Wireless battery charging of the body interaction vibrator development board

bisiliconeformfilledreadybigsiliconereadyvogel2One major Problem oft DIY electronic sex toys (or massage wands) are the need to charge the batteries. Usually the batteries are charged via the USB connector. This means that there is a physical connection between the sex toy and the USB connector, making it impossible to mold the whole sex toy with eg. silicone.


seeedwirelesscharging

The solution is to use a wireless charging module (eg. this module from Seeedstudio). It comes in two parts: The sender (IN) and the receiver (OUT). Both are connected with a coil. If you place the two coils close together, the sender coils induces power in the receiver coil. Though you can share the batteries wireless. The receiver could be molded, separating the electronics, batteries, connectors etc. from the environment. The result is a form with a smooth surface enabling secure usage as a sex toy.


bigsiliconeready crossmeovedWe have made an easy DIY solution based on the body interaction vibrator development board, wireless charging module and a 3d printed silicone molding form.


big wireless part a

Part A: The molding form consists of two parts.

bigwirelessform

3d print form A

Step 1: The form comes in 2 parts. Print both parts of the form. The STL file is called part A. After printing polish the inner part of the form as well as the surface between the two sides.


big wireless part bStep 2: Now print out part B. It is used to fasten the board, battery, receiver coil and receiver board.


verkabelung seeedwirelssechargingStep 3: Connect the + pad of the wireless charging receiver board with the pin marked + of the vibrator development board (that’s pin 1 of the MAX1555 battery charging IC). Connect – of the receiver with the GND pad of the vibrator development board. You need two short wires and have to solder them at the two boards.


wiresStep 4: Now wind up the wires connecting the board with the battery and the vibration motor. (The connection to the receiver board is not shown on the image.)


battery and board installedbattery and board installed 2Step 5: Now attach the coil on the shorter “cross” of part B with some glue. There must be space between the coil and the outer longer cross. Then attach the board, battery and vibration motor as shown in the pictures. you can use some glue to fix these parts. Be sure to set the switch to the ON position.


The receiver board can be placed within the coil. It’s the small long board in the middle.


boardandbattery in half-formStep 6: Fix part B (with board, coil etc.) at part A. Be sure that there is enough space between them (min. 5mm).


form and electronics inserted 1form and electronics inserted vogelansichtfilles form from topStep 7: Now attach the second part of part A. Use some tinkering wire. Double check: There must be space between Part A and part B. And there must be space between the coil and the upper edge of form A as the coil must be molded by the silicone.


aftermolding wireless formStep 8: Now pour silicone into the form. Use silicone with a high Shore A value. The higher the Shore A value is the higher is the firmness of the silicone form. We have used silicone with Shore A 45. You need about 90 ml silicone.


bigsiliconeready removedStep 9: After the silicone gets hard, remove the tinkering wires and softly remove the form A. Remove overhanging part.


bigsiliconeready crossmeovedStep 10: Now you can remove the outer cross of part B.


bigsiliconereadyvogel1That’s it. It takes about half an hour (without printing). Before using check carefully that the silicone is solid. Even if you skew the silicone form you should not be able to feel the edges of the vibrator development board. Otherwise there is the danger to get hurt. Use it as a massage toy on your own risk. For charging the batteries place the molded coil over the sender coil. The yellow charging LED should go on.

The next development step is a battery charging station!


Download 3d printing files from Thingiverse

Modify and construct your own with the online 3d modelling software Tinkercad: Form A, Form B


Molding a silicone case for the BI1 board with a 3d printed form

As alternative to the 3d printed form a flexible form made with silicone could improve the handling of the body interaction board (BI1) for certain applications. The vibration is more comfortable and less noisy compared to other cases. If you want to do it on your own follow this how-to.

Silicone molded BI1

Silicone molded BI1: vibration motor (top), RF12b (bottom)

IMG_20150228_122647

silicone molded BI1 board – vibration motor (top), LiPo (bottom)


Some adult toys are made of silicone or at least are coated with silicone. Silicone cases are easy to clean.


We have constructed a 3D printed form where we will fill in the silicone. The form comes in two parts that have to be fixed to one another by tinkering wire. In addition the board has to be hooked to the form. For this we use a USB connector which is plugged in the USB port of the board. Then the USB connector is fastened to the form.

Form for molding

Form for molding

USB connector holding BI1 board is fastened with tinkering wire

USB connector holding BI1 board is fastened with tinkering wire


Use a silicone which will become solid after moulding. This property of silicone is indicated by the shore A value. Silcone with a low value is flexible. We use silicone with shore A 43.

Molding form with USB connector and 2 component silicone shore a 43

Molding form with USB connector and 2 component silicone shore a 43

molded BI 1 and 3d printed  form

molded BI1 and 3d printed form


Do you want to try it on your own? Follow this how-to and tell us your experience.

%d bloggers like this: